World #2 Sherbet Desert
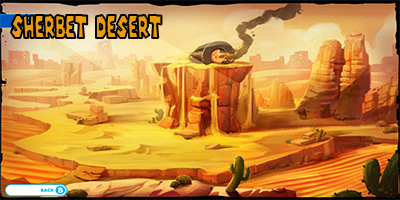
♠ - Back to Home
| World 2-1 Cold Hands, Warm Heart |
There will be two segments to deal with in this level. You will have 4/4 Turns for the first segment and 5/5 turns for the 2nd segment. Don't forget you can restart the battle after each segment to heal up all party members. You should be spending some coins here and have at least one party member with a weapon that deals 55-65 damage. I would prefer two weapons like this because the Rabbids wear green hats and have more Hit Points. They can also activate themselves with a shield. Players must shoot the shield once to deactivate them.
I used Luigi, Rabbid Peach, and Mario in this level. Always activate your Hero's Sight, and Steely Stare. They are guaranteed extra hits on the moving enemies. M-Power should be used at the very start of the battle, because all allies will be close together to gain the bonus. From that point you can take out 1-2 if not more Rabbids due to having higher damage output. Itchy Feet is good, yet not essential. If you have the chance to use it, use it! I just wouldn't call it a game changer in these two segments.
I wouldn't worry too much about health, these guys can deal around 60 damage, but after completing World #1 our Hit Points have increased! Also with Rabbid Peach's heal and the battle restart "cheese tactic" you should be alright. It is a very easy two rounds and overall just have the appropriate weapons with the nicer amounts of damage.
After completing the battle segments, you can explore the area a bit. Solving a quick switch block puzzle will result in 5 power crystals. Moving the ball around the ice and into the ice pillars near the ring coin ring, will reveal the path to the next level. Finally, the red coin ring rewards the player with the Bwahnzai Bill Blaster for Mario. This is the blaster seen on the cover of the game.
If you want the Blastberry Swirl Bworb Weapon, use the Blue Rabbid Cannon and warp to the Blue Coin Puzzle. Complete the mini-game and inside the treasure chest will be this new Weapon for Rabbid Luigi as your reward. That pretty much covers everything we can do now in World 2-1, so head to the next battle flag for the next level World 2-2.
World 2-2 Undergarment Gulch |
World 2-3 Guardians of the Oasis |
For the battle, we will be introduced to supporter enemies here. They are pretty cool looking, can heal their allies and seem to throw some AoE ( area of effect ) type of grenade. The battle is relatively easy even for the perfect, just use higher powered weapons if you are in trouble. Also, the supporter is pretty deep in the battlefield, so it may be best to kill enemies here just in this case. If an enemy is dead they can not be healed.
In the next segment we will be escorting ice block toad! But first we must move the ice block onto Toads Mushroom head. To do this line it up on the opposite side of the red star switch and then push it. Finally, push it over onto toads head and you can jump down and begin the escort Toad segment.
Escorting Toad is all about keeping Toad alive. Having Luigi in your party and the Itchy Feet Perk is a huge help as all party members will gain an extra cell of movement. You can gain more cells of movement the more you have Itchy Feet Leveled up. If Toad is hurt, it is probably a good idea to also have Rabbid Peach in your party for the healing skill. Finally, know that Toad can not be jumped on by allies, he can be hit by any special effect including honey, wasting an entire turn. Cleansing Jump will not work, because you can't jump on allies.
World 2-4 Square One |
If Toad is hit, get heals on him. If he is honeyed you are in trouble. Remember most importantly to attempt keeping all characters alive. M-Power is crucial and being in the radius of all skills and perks. Sometimes you can get a lucky bounce off a smasher, but that's not good enough to go on. Like I said it is tough and practice makes perfect here. Be sure to pick up the Banzai Bill artwork in the brown treasure box to the right of the level five entry flags.
World 2-5 The Gatecrashers |
 This is a great fight and I actually got it on my second attempt. The enemy design is really cool and both of these mid-bosses have very awesome moves. What you should do is take out Sandy First. You should also keep cover in this Mid-Boss Battle. The team of choice for me was Rabbid Luigi, Mario, and Rabbid Peach. Once again Focus first on Sandy. The reason is Sandy has a immensely deadly Sand Grenade Attack that has a large radius, can set you ablaze and breaks covers.
Remember that the Ice Blocks/Covers can be broken in one shot. Rabbid Luigi's Rocket Attack has AoE ( Area of Effect ) and more range than the Bworb. In fact, the Bworb is a bad weapon for pure damage, it is good for Special Effects. Since we really need to put out damage in this Level, take the Rocket. Use your coins on the best Rocket Weapon you can currently purchase. This is also good for Mario's Hammer and Rabbid Peach's Sentry Attacks.
Blizzy has powerful attacks as well and can Freeze the players. If you are Frozen with an ice block on top of your head, you can't use skills/ability moves. This is not as bad as being destructed by Sandy's Sand Grenades. Both Bosses have around the same HP ( Hit Points ) at 320 on a near estimate.
In conclusion, Focus attacks on Sandy First. Use Mario, Rabid Luigi, and Rabid Peach. Know Ice blocks take one shot to dissipate. In that case you can follow up with an attack afterwards with another allies blaster/ranged attack. Pure damage is more crucial than having Special Effects and if you are Ice Frozen by Blizzy, don't forget Cleansing Jump.
World 2-6 Shields Of Sherbet Desert |
We will be introduced to the Buckler enemy type here. These guys may be tough later on in packs. For now there is only one of them. I suggest taking out the supporters first, then the hoppers/ziggy's then finally focusing on the Buckler. We also have plenty of turns here and overall the entire level is rather simple, even for the Gold Trophy!
Before you enter world 2-7, there will be several puzzles in the area. You can collect some artwork, weapons, and more from solving them all. However, i highly suggest coming back after gaining all the abilities in the game for these. It will make it much easier to do this in one run later, please see our video section under each worlds walkthrough when you are ready, in this strategy guide
World 2-7 Temple of Bwahmanweewee
There will be two battle segments here. The first one is to defeat all the enemies while a raging Tornado is in your pathways. The Tornado, doesn't do much damage but it can bounce allies out of the arena. This will make them take extra damage and replace there current position. Don't worry to much about that Tornado, its random. Just focus your attack power on the enemies.For Segment two, which is harder you must reach the goal. Stick to the left side of the map with all your characters. Use the pipes and have one character truly focus on reaching the goal. All the while you want to focus on the smaller enemies. The Bucklers can honey you which means you can't move. This is extremely dangerous in reach the goal areas. Stay far away from the buckler enemies and you should have no problem achieving a Perfect!
World 2-8 Call of Sherbet Mountain |
Use the Freeze Boxes to your advantage. Take out the Smashers first and if a supporter pops out make the supporter your top priority. You must defeat 6 enemies in 6/6 Turns to walk away with a Perfect, as well as keeping your entire team alive.
Rabbid Mario and his Wrath of the Dragon weapon is not only awesome looking, but it works great vs Bucklers and can even Stone Special Effect them! Be sure to unlock this one and even Bucklers will raise up their arms in surrender if you get close to them with this weapon. You should get a perfect easily if you are just extra aggressive in this battle segment. Also Rabbid Luigi is useful for his weaken technique. Finally, Rabbid Mario has the Magnet Dance which is very viable throughout the entire game.
Afterwards you will have to solve another puzzle. Be sure to use the green block switch first. Then move the ice block so you can get ready to hit the blue switch. You want the ice block to line up with the blue switch so it is in the middle of the ice ring. If all else fails you can resort to some trial and error. In the end, this will lead to the next Boss Battle, the boss of World #2 Sherbet Desert.
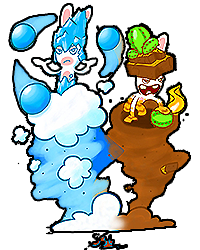
World 2-9 It Came from the Freezer |
After dealing with phase #1, which is probably the most important phase. Attempt taking very little damage here and packing out tons of damage. Know that the Boomshot has a spread so it will deal damage over the Icicle Golem's Shield. The Grenade Duck Weapon can also override the shield making Princess Peach Invaluable here. Once the shield is down phase #2 will begin and it's a pure fight where the Icicle Golem will have 500 Hit Points! Take him out here being strictly offensive and aggressive with your most powerful attacks. Use M-Power in this phase and save your Royal Guard Skill with Princess Peach for the end of the fight.
In Phase #3 the Icicle Golem will begin to Summon other enemy types. First it will be Two Smashers, avoid them at all cost, while now using Ranged attacks on the Icicle Golem. Next he will start to summon supporters. This is where you should just try and finish him off, rather than focusing on the Supporters. Getting off plan will probably make you lose an ally or two, if not the entire fight. I walked away with a perfect here and had a round or two to spare.
At the end of the battle is Phase #4, and you must do one more attack on the Head of the Icicle Golem. In this case it is not over until the fat lady sings. Just be sure to land that attack in on the Icicle Golem's Head. You may use a dash and then the cut-scene will play. Congratulations on beating World #2 Sherbet Desert and it's tough and rough boss the Icicle Golem!
| World #2: Sherbet Desert All Collectibles Videos |