World #1 Ancient Gardens
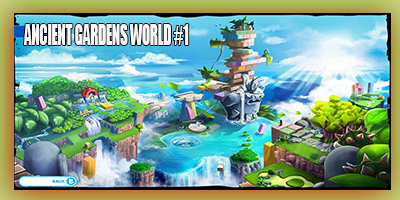
♠ - Back to Home
1-1 Unlikely Heroes |
Players, will learn basic Attack Functions at this point in the game. The layout of each level is also shown. The game seems to progress in an exploration area. The exploration areas hold secrets,items, and collectibles. Then it goes into a combat area. The combat areas can be taken out in various ways, some more tactical/difficult than others. Then the game goes back to exploration, and again back to battle. The game rotates this way until the level of the world is completed. There are various Secrets to explore, so if you want to collect everything be sure to use this guide as often as possible. You will enjoy your experience of the game much more while reading, I promise
1-2 Flower Bud |
The player should also be wise to the cover system in the game. Taking cover and sometimes passing your turn is a good move. It can get enemies closer to your allies. With special techniques like Hero's Sight ( Mario Technique ) , the player can finish off foes faster. Overall, this level will give you a warm up on all the basics in the first level with less help. I still found it to be rather easy for the Gold Trophy.
1-3 Danger From Above |
Hero's Sight is one of Mario's Techniques that you can use early by accessing the level from the Washing Machine. If in story mode, you will gain this ability once you reach World 1-4. Hero's Sight is a potent ability that will hit an open target during the enemies turn, while that particular foe is moving. This is important for extra damage while on defense. Rabbid Luigi has a special that can stop the Proc or ( % Chance ), of a Special Effect taking affect on your allies.
For the level, Put Mario into cover behind the wall on the right. Put Rabbid Luigi in the middle "cover" wall that is breakable. Finally, put Rabbid Peach on the left wall/mountain. Don't forget you can jump on the top of your allies and reach the hill/mountain above. Don't forget to always use all of your skills/attacks/moves unless you absolutely can not. It is wise to pass to the enemy at times, but just be sure to always be knowledgeable of your skill statuses.
I believe it is possible to get No Damage runs completed with this game. You can probably even achieve the latter early on in the game. The rest of this guide will be going for the least damage possible, so if this is too in-depth for some players you may want to seek other sections or scan through this guide as an overview. It is also wise to conserve your health meters and be focused on them for the entire battle, even the first half. You will not heal hit points ( HP ), until you complete a level. In this level, we have a reach the goal " battle" coming up next.
Reaching the Goal segments, will require the player to just reach the yellow "Goal" area of the field. This is easier said than done and you can still attack enemies and it may be necessary for a No Damage run. In this segment stick to the right side of the field. Know you can hide or use the white pipe as cover. You have a ton of turns for this segment, 7/7 to be exact. Keeping your Hit Points up in the previous segment will make the rest of this level a breeze, just don't forget your Ally Jumps.
1-4 Welcome to the Jungle |
Firstly, the game will introduce the "Bounce Blocks" or Super Effect Blocks. In this level they have the games Bounce Symbol. There will be two of them in the first battle segment. The Player should shoot the two Ziggy Rabbids at the start of the battle, while they are in cover behind the two Bounce Symbol Blocks. This will send them both flying off the map into the out of bounds zone. If an enemy is knocked out of bounds they are instantly defeated.
For the 2nd battle segment there will be four White Warp Pipes in the area and two Bounce Symbol Blocks. Two of the Rabbids will be in front of the blocks and two Rabids disguised as cover blocks in the back of the field. If you saved enough Hit Points ( HP ), in the first segment this can be easier.
Use the Warp Pipes to do your "Move Attack" into an enemy, then follow up with Regular Attacks. Use your techniques such as Hero's Sight for Mario at the start of the battle. We are also using Rabbid Peach and Rabbid Luigi for this level. Have Rabbid Peach use her Technique if she is left wide open to attacks. This is the same for Rabbid Luigi's Super Barrier Technique. Be sure to use the Bounce Blocks when the enemies from the back take cover behind them, it deals more damage and can knock them off the field into the out of bounds zone.
The Overworld, will also consist of a small maze as we head out of Level 1-4, Welcome to the Jungle. This maze will have a switch that will reveal a pad. Hit the pad with the action button and then the two Sun Blocks will move. Inside that area will be a treasure box, open it for some Official Sound Track Notes. You may be running this maze a few times and you will surely want to run through it after activating the Red Coin Switch. Hit the Red Coin Switch and then navigate the maze collecting all of the Red Coins. If you collect them all a larger Treasure Box will Appear in the Center of the Maze. Open the box and it will contain the Rainbow Runner, a Blaster for Rabbid Peach.
1-5 Brother Where Art Thou? |
If you want an extra boost and have the Pixel Pack DLC, You can use two of the Pixel Blaster Weapons. The Fragmenter for Mario is good because of the Honey Chance and Extra Damage. Retro Deflator is also good because it deals extra damage and more damage against Hopper Enemies. There will be two-three hopper enemies in this battle segment. Honey will keep them from moving if you are lucky and deal extra damage. The arena is kind of big and the enemies move around often, so Honey Chance is a wise choice. Finally, take the strongest Bworb you have at the moment for Rabbid Luigi, Mine was the Turbine.

Pirabbid Plant: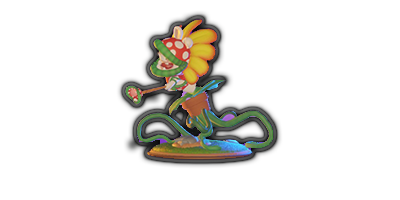
This is the second segment of the level. You will find a large Mushroom right before this segment. It will heal all of your allies 70 Hit Points. You will have 8/8 Turns to complete this battle without any of your allies dying for the Perfect and Gold Trophy. It took me a few times, but I eventually got the Perfect in as little as 3 turns. All you have to do is focus your attacks on the Piranha Plant. Once the Pirabbid Plant is defeated the battle will end.To defeat the Pirabbid Plant quickly and safely, do not stand near the Fire Explosion Blocks and do not attempt to use them as an offensive move just yet. Maybe later in the game there will be a speed tactic for them, but for now it is far too advanced for us newbies. Remember to use your Dash Move attack as often as you can into the Piranha Plant. As a matter of fact, focus all of your attacks on the Piranha Plant.
Remember after Dashing into an enemy you can move back into cover during the same move string. You can also use your abilities if they are not on cool-down and of course use your main or primary weapons attack. Honey Chance and Burn Chance are great here. Honey Chance will deal extra damage and stop the Pirabbid from moving. Burn Chance deals extra damage and can make the Piranha Plant run wildly, leaving it wide open for more attacks, as well as extra damage.
Once you have defeated the Piranha Plant/Pirabbid you will gain the Skill Tree and 10 Power Orbs to level up your skills. We will focus on the Skill Tree for each character separately in the Character Analysis Section of this strategy guide. Good Luck and Congratulations on defeating your first mid-boss, enjoy the rest of the game!
1-6 On the Bubble |
There are a large amount of enemies in this segment but nothing too difficult. Use Luigi's Steely Stare Technique which is similar to Mario's Hero Sight. Use the both of these to hit enemies that are on the move out of turn or on defense. Be sure that you used all of your power crystals! Each character will gain 10 power crystals each to spend after beating the Pirabbid in world 1-5.
Mario's Hammer is very powerful and is great to follow up with before a dash attack or after for finishing off an opponent. Once again Luigi should be in the back sniping and staying far away from the fray. Rabbid Peach should keep her distance mid-range unless you have your Shield Technique up. Please don't forget to go for attacks from above whenever you have the chance. Remember you can restart each segment battle at anytime if you are going for the Perfect.
After the level is over, there will be lots of exploration until you reach world 1-7. There will be tons of switches to press, a few coin puzzles and more. Be sure to complete these puzzles if you want some extra artwork, soundtracks, and most importantly a new weapon which is a Precision weapon for Luigi the Spike Strike! You can acquire this one by completing the Blue Coin puzzle, from launching yourself with the Rabbid Cannon. After you collect everything progress to the next beautiful level underneath the waterfall.
| 1-7 Do You Stack Up? |
This is a beautifully designed level, with excellent visuals, and gorgeous music. The battle can be a bit tough for the first segment. We must kill Five Hopper enemies in 6/6 Turns. There will be three hoppers initially and more will pop out of ground. They also keep coming so that there is always a stead three enemies on the battlefield. Prepare yourself with Bounce Chance or even Push Chance Weaponry.
Luigi's Pixelated Boom Broom, will work nicely here. Rabbid Luigi may still be best suited with the Turbine Weapon for the Burn Chance and extra damage against Hopper Enemies. Mario should be using Piston Panic, which was acquired after defeating this worlds mid-boss The Pirabbid Plant. Piston Panic offers 52 Bounce Damage and 30% Bounce Chance. The upper half of the arena is small, making out of bounds a high possibility with bounce chance.
Remember now that we have Four Characters in our party, we can switch out a character with Low Hit Points or HP for another character. In this case, take out your weakest ally and put Rabid Peach in the mix. We should have at least 20 Power Crystals by now, to acquire her Heal Technique. Purchase the Heal Technique and put her on the team. She can then use this heal technique to grant 20% of the rest of your teams Hit Points back when you feel the need arises. This will be essential to gaining a Perfect on this World's Level 1-7.
Smashers:
In segment two we must reach the goal. We will be introduced to the very powerful Smasher enemies. I don't suggest doing battle with them just yet, for now simply run to the goal and avoid conflict. You may click Restart Battle even in story mode to gain full health back. This is a bit cheesy or cheap so I personally don't recommend doing it.
If you are going the "hardcore" route, Bring Rabid Peach along for your previously weakened ally. If you want to attempt taking out the Smasher, which I don't recommend because more spawn from the ground, you could try Smasher Damage increasing weapons. Ziggy Rabbids will also pop out of the ground on the 2nd section of the level.
Utilize your team jump to reach further distances. Use Rabid Peach's Shield as often as possible and if anyone is to get hit by a 60 Damage Smasher, it should be Rabbid Peach with Shields up. Shields last One and only one entire turn until further notice or upgrades. Rabbid Luigi's Super Barrier will also increase some damage reduction, however I recommend using the newer gained, Weaken Technique on the Smasher to even further reduce incoming damage for all allies if it connects.
When you reach the goal, which you will have 6/6 Full Turns to do so, you will complete the 1-7 level. Right before world 1-8 will be a Blue Rabbid Cannon. Go inside and shoot yourself to a Blue Coin Challenge. Collect all the Blue Coins and you will receive the Killer Extinct Sentry Weapon for Luigi. This weapon deals extra damage against Smasher Enemy Types.
World 1-8 Precarious Pillar |
 Before the next part of the level, you will have to solve a switch and white pipe puzzle. Each Push Switch will move a section of the wall with the pipes mounted on it. Move the pillars/wall so all the pieces of the White Pipe line up. You will be notified by the game when this occurs. When you have completed the puzzle take the White Rabbid Pipe to the next battle segment. it seems we are up against some Smashers, so take Killer Extinct and Luigi with you!
In the next battle segment, you will have 7/7 Turns for the Perfect. Defeat 2 Smashers and 2 Hoppers before your turns are up. The arena is narrow so Push Chance is a good option for the left and right edges. Smasher Damage will help as well. If you are using Luigi, try and avoid being hit by the Smasher at all cost. Smashers deal 60 Hit Points worth of damage and Luigi can die in one turn in this case with only 130 Hit Points at a base. Since the arena here is long and narrow, Luigi is still a good pick to finish off the deeply placed Hoppers.
Do not use Mario's Hero Sight, unless you are confident enough that the Smasher is out of range and will not hit you. Smasher's can deal damage to all enemies in a line if you are bunched together. The Damage is still 60 at a base, unless they are weakened by Rabbid Luigi's Weaken Technique. Rabbid Luigi is a good choice in this case to weaken the Smasher enemies tactically. Finally, Luigi's Steely Stare is a similar attack to Mario's Hero Sight, so be just as careful using that one as compared to Hero's Sight.
Once you complete this segment, you will see four White Rabbid Pipes. Solve the puzzle by using Trial and Error for each and every pipe. You will be rewarded with a Health Mushroom, 5x Power Orbs, some coins, and the path to the Third Battle Segment. Head up the fourth pipe all the way on the right. Enter the black flags and get ready for more Smashers!
In the final battle segment of the Level ( 1-8 ), you will have to defeat Four Smashers! You will fight up to three at a time and they keep spawning back from the ground. The chain chomp well hit one of the first smashers for around 75 Damage as a little bit of an early boost. The Smasher near the pipe can be shot and still not reach you, if you only shoot him once. You can then back characters away and finish him off for the first smasher kill. Following that up with the already weakened smasher. Rabbid Peach's Shield is good here, as is Rabbid Luigi's Weaken Technique to lower smasher damage. The best effect of them all is Honey Chance. If a smasher is stuck with honey they can't move. In that case stay away from the Smasher and just blast at them ( Requires Luck ).
World 1-9 Top Banana |
The object of this fight is to defeat the boss. However, if you shoot or deal damage to Rabbid Kong, he will simply eat one of his many huge bananas and regain his Hit Points ( HP ). To counter this we must move at least one character to the large Banana Platform. If you step on the platform all of the Bananas will fall into a hole. Rabbid Kong will get pretty upset over this and may Grab and Crush you for around 50-60 damage, depending on if you have defensive buffs or not.
This is when he is susceptible to being attacked. Once the bananas are down the hole, follow up to knock out his 120/120 Hit Points. Rabbid Kong seems overall susceptible to Critical Hits but he is immune to many Super Effects if not all of them. Once you lower Rabbid Kong's Health to 0/120 he will move to the next platform. Rinse and repeat the tactic within 13/13 Turns, keeping all allies alive Three Times. If you do so you will defeat this immensely fun boss and get a Perfect, Gold Trophy in the process.
You will unlock tons of rewards, weapons, and the move command after defeating Rabbid Kong. Be sure to check the Washing Machine, as challenges for World -1 have been unlocked. Challenges will reward the players with more Power Crystals/Cores. Don't forget to backtrack and re-explore World #1. Now that we have the Move command we can get a few extra collectibles. I will be listing them soon in this guide, whether it be in video form or text form. Stay tuned daily for updates and check our other sections for collectibles locations at the moment. Enjoy the rest of the game and CONGRATULATIONS on beating World #1!
Ancient Gardens World #1 Challenges |
World 1-1 Swarmed
This challenge is found in World 1-1 right outside the castle victory flags. Speak to the Rabbid with the white and blue mushroom cap to start the challenges. This one is called Swarmed and is rated Very Easy by the game. It is actually quite strategic and a bit tough. For me, it took about an hour and I got it on my 5th attempt. With this being said, I can imagine things get more difficult. If you are in for a challenge these may be for you. Remember, at the moment the rewards are mainly just Gold Coins and Power Crystals.In this challenge we will have to defeat 14 enemies ( Ziggies ) in 3/3 Turns. The trick is to attack them with AoE ( Area of Effect ) damaging moves. The Hammer of Mario works excellent as does Luigi's and Rabbid Peach's Sentry Attacks/Moves. Using Mario, Luigi, and Rabbid Peach can work nicely here. At the start of the match be sure to pick the highest powered weapons you have, especially the Hammer for Mario and your Sentries. In fact have the most High Powered Weapons you can get!
For your skills, you definitely want to have Rabbid Peach's Upgraded Dash, called Stylish Dash. This will allow you to hit two enemies at once, which can finish off the weakened Ziggy enemy types. Mario's Hero Sight will give a bit of help, but his M- Power is huge to use right before landing a big AoE attack. Try and synergize Mario's M-Power to hit all team members. You will also want to synergize M-Power with a Sentry or Hammer attack on Multiple targets.
The name of the game for this challenge is hitting multiple enemies with high powered attacks all at once. The more enemies you can group together and attack, the easier this will be. This will result in completion of the challenge. It is easier said than done, so take your time and practice. Once again this is considered a Very Easy challenge by the game, so you have be warned.
| World #1: Ancient Gardens All Collectibles Videos |