
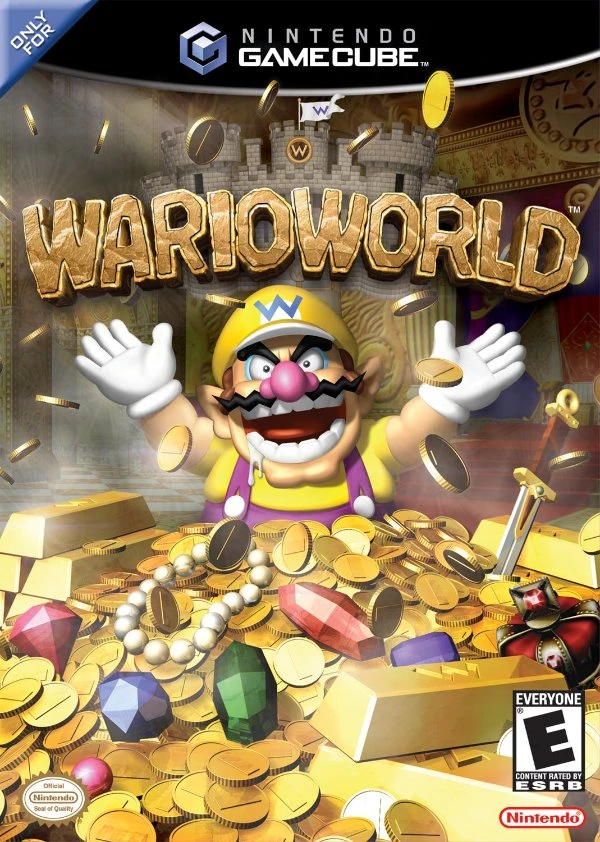
Wario World
Overview

Wario World launched on Nintendo GameCube in summer 2003 as Wario’s first console adventure. Developed by the famously skilled action-game studio Treasure — the team behind Gunstar Heroes, Ikaruga, Sin & Punishment, and a long list of other beat-em-up and shoot-em-up cult favourites — and published by Nintendo, it remains the only 3D Wario action-platformer ever released.
Up to this point Wario had starred in 2D handheld titles in the Wario Land series on Game Boy and Game Boy Advance. Wario World is his jump to a home console in full 3D, with Treasure bringing their signature high-impact moment-to-moment combat sensibility to the formula. The result is a hybrid: part 3D platformer, part beat-em-up brawler, with the same character collection-driven structure that defined the 3D Mario era but with Wario’s signature focus on physical violence as a problem-solving tool.
The core mechanic is Wario’s outsized physical strength. Where Mario relies on jumping, Wario relies on punching, ground-pounding, body-slamming, and — most distinctively — grabbing enemies and using them as weapons via three powerful Mad Moves (Mega Toss, Piledriver, Wild Swing-Ding). Many bosses are immune to standard attacks and can only be damaged by stunning a smaller enemy and using a Mad Move on the boss directly.
The game spans 4 themed worlds (Excitement Central, Spooktastic World, Sparkle Land, Pecan Sands) linked by a central Treasure Square hub. Each world contains 2 main levels plus a boss arena. The total package is 8 main levels, 10 named bosses, dozens of unique enemies, and 6 different endings depending on how many Spritelings the player has rescued from cages along the way.
The Story

Wario has just finished construction of his sparkling new castle — golden walls, luxurious chandeliers, marble floors, the works — and is sitting on his throne in self-satisfied bliss. The lower chambers are stuffed to bursting with the treasure he’s pilfered from his many previous adventures across the Game Boy, Game Boy Advance and other corners of the Mario universe.
The Black Jewel Appears
Hidden among his accumulated loot is a mysterious Black Jewel that Wario has somehow acquired. Without warning, the Black Jewel awakens. It uses its dark power to transform the rest of Wario’s treasure stash into monsters and scatters his beloved hoard across four separate worlds — the wealth that was once his greatest pride has become his greatest foe.
The Black Jewel also captures the Spritelings — forest spirits that watch over Isle Delfino-style natural balance — and locks them in cages scattered throughout the four worlds. The Spritelings agree to help Wario recover his lost treasures in exchange for being freed.

Wario’s Quest
Wario sets out from his ruined castle through a magical doorway leading to Treasure Square Courtyard, the hub world. From the Treasure Square, Wario can access each of the four corrupted worlds. He must:
- Punch, dash and piledrive his way through 8 levels (2 per world)
- Defeat the boss of each level to clear it
- Rescue Spritelings from cages in every level (5 per level, 40 total)
- Recover his 8 stolen treasures hidden in coloured chests in every level
- Collect Red Diamonds, Statue Pieces and Gold Statues to extend his health
- Battle the world boss in each world’s boss arena to claim the key that unlocks the giant treasure chest
The Resolution
The final confrontation takes Wario back to Treasure Square Destroyed, where the Black Jewel has set up its dark headquarters. The truth: the Black Jewel itself is the ultimate villain, manipulating Wario’s treasure to expand its own power. After Wario defeats the final boss Captain Skull and reclaims the last of his treasure, the Black Jewel is contained. The closing scene shows Wario sitting on his throne back in his castle — except the appearance of his recovered castle depends on how many Spritelings he rescued along the way.
The 6 Endings
Wario’s ending depends entirely on how many Spritelings the player rescued from their cages across the 8 levels of the game. There are 40 Spritelings total (5 per level). The game shows one of six different ending cutscenes based on Wario’s Spriteling count:


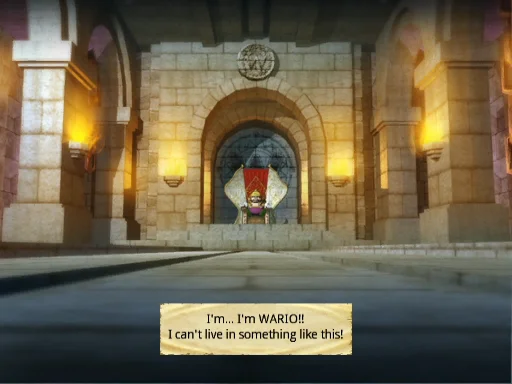
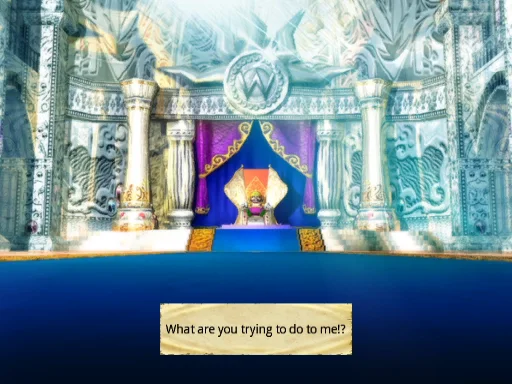
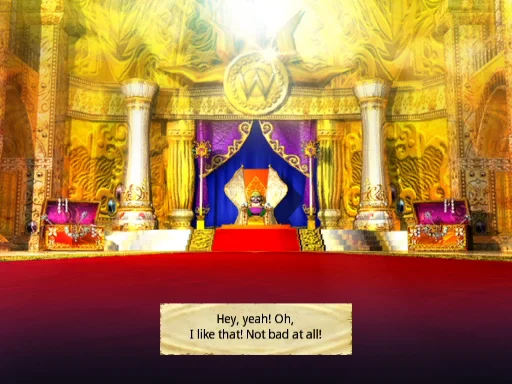

This variable-quality castle endings system is a direct callback to the Wario Land series, where the size and grandeur of Wario’s castle had always reflected the player’s collection completion. Wario World takes it further by giving each tier its own unique cutscene with a different reaction from Wario.
What Triggers Each Ending
| Ending | Spritelings | Castle Quality | Wario’s Mood |
|---|---|---|---|
| Plant | 1 | Tent in a dark forest | Shocked & disappointed |
| Wooden | 2-10 | Medieval wooden castle | Angry at the Spritelings |
| Stone | 11-20 | Drab stone castle | Resentful |
| Silver | 21-30 | Silver castle | Ungratefully disappointed |
| Golden | 31-39 | Golden castle | Satisfied |
| Best | 40 (all) | Golden castle with treasures | Reunited with riches |
Gameplay
Wario World is a 3D action-platformer with heavy beat-em-up DNA. The camera is largely fixed in cinematic angles rather than free-look, and Wario himself is built for high-impact close-quarters combat rather than acrobatic platforming.
Core Loop
- Treasure Square hub: Wario’s starting point. Access the 4 worlds from here
- Enter a world: each world has 2 main levels + a world boss arena that opens after both levels are cleared
- Clear a level: traverse the level, defeat enemies, rescue Spritelings, recover treasures, and reach the level boss
- Defeat the level boss using Mad Moves to deal damage — standard attacks won’t work on most bosses
- Open coloured treasure chests: 8 per level, gated behind 8 different treasure buttons
- Defeat the world boss to claim the key that opens that world’s Huge Treasure Chest in Treasure Square
- Repeat across all 4 worlds to reclaim the full hoard, then face the final confrontation
Health & Death
- Wario’s health is measured in hearts. He starts with 4 hearts maximum
- Collecting Gold Statues increases his maximum health by half a heart each — these are pieced together from collected Statue Pieces
- Garlic heads restore one heart of health. They’re sold by Garlic Dispensers for coins, or found in wooden chests
- On Game Over, Wario can pay 200 coins to continue from the same point — a uniquely Wario mechanic where his greed even applies to his own resurrection
- Coins drop from defeated enemies, bosses, and some wooden chests
Collection Categories Per Level
Every main level features four categories of items to collect:
- 4 hearts for health restoration (plus extendable max via Gold Statues)
- 8 Red Diamonds hidden in sub-areas — collected to unlock the Stone Doohickey
- 5 Spritelings in cages — rescue all 5 in every level for the best ending
- 8 Treasures hidden in colour-coded chests behind matching treasure buttons
- Statue Pieces that can be assembled into Gold Statues for max-HP extensions
- Coins from defeated enemies and chests, spent on garlic or continues
Wario’s Moves & Mad Moves

Wario’s moveset combines familiar Mario-universe abilities with his own brand of brute-force combat. Several moves return from the Wario Land series, but the Mad Moves system is the defining new mechanic.
Regular Moves
| Move | Description |
|---|---|
| Jump | Standard jump. Lower than Mario’s but with weight behind it |
| Punch | New move debuting in this game. Beats up enemies and crushes blocks |
| Dash Attack | Wario’s signature shoulder-ram move. Charges forward to plow through enemies |
| Hyper Suction | Wario opens his mouth to suck in nearby coins and garlic from a distance |
| Ground Pound | Mid-air slam attack — Wario’s body weight makes this one of his strongest hits |
| Corkscrew Conk | Wario transforms into a rampaging spinning yellow ball to hit high-flying enemies during a Dash Attack |
Mad Moves — The Combat Backbone
| Mad Move | How It Works |
|---|---|
| Mega Toss | After stunning & picking up an enemy, Wario hurls it across the arena with all his might. Crushes whatever it hits |
| Piledriver | Wario uses the picked-up enemy to slam hard into the ground. Destroys the picked-up enemy and damages nearby targets |
| Wild Swing-Ding | Wario spins around in place while holding an enemy, hammering it into a circle of surrounding targets. The signature crowd-control move |
The Mad Move loop — stun an enemy, grab it, choose your Mad Move, unleash it on the boss — is the defining gameplay rhythm of Wario World. Treasure-mastery levels can chain together Dash Attacks into picks-up into Wild Swing-Dings into Mega Tosses for spectacular combo sequences.
Controls
GameCube Controls
| Input | Action |
|---|---|
| Control Stick | Move Wario |
| C-Stick | Rotate camera view |
| A button | Jump / Corkscrew Conk (during Dash Attack) |
| B button | Punch / Hold for Dash Attack |
| X button | Pick up items and unconscious enemies |
| Y / L trigger | Hyper Suction (sucks in coins & garlic) |
| Z button | Dash Attack |
| R trigger (mid-air) | Ground Pound |
| D-Pad / R | Change camera angle (in underground rooms) |
| Rotate stick (holding enemy) | Wild Swing-Ding |
| Hold B (holding enemy) | Mega Toss |
| R mid-air (holding enemy) | Piledriver |
Treasure designed the control scheme to keep the Mad Moves accessible — once an enemy is in hand, the three Mad Move triggers are deliberately mapped to natural follow-up inputs from the grab.
Treasure Square Hub
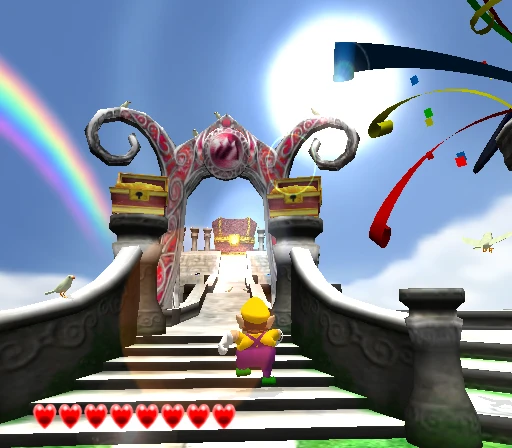
Treasure Square Courtyard is the hub world that links Wario’s castle to the four corrupted worlds. After escaping his castle through the magical doorway, Wario emerges into the Courtyard and uses it to travel between worlds.
What’s in the Hub
- Four world portals: one each for Excitement Central, Spooktastic World, Sparkle Land, and Pecan Sands. Initially only Excitement Central is unlocked; others open as Wario gathers the required treasures
- The four Huge Treasure Chests: one per world, opened with the key claimed from each world’s boss
- WarioWare microgame stations: the 8 unlockable microgame demos can be downloaded to a GBA from here via Link Cable
- Garlic Dispensers: Wario can stock up on garlic before entering a world
Treasure Square Destroyed
As Wario clears worlds, the Black Jewel’s influence over the hub grows. Eventually Treasure Square becomes corrupted — the entire hub transforms into a final dark-arena version where Wario faces the closing showdown. The Treasure Square Destroyed phase is when the Black Jewel’s ultimate plan is revealed.
The 4 Worlds & 8 Levels
Wario World is divided into 4 themed worlds, each containing 2 main levels and a boss arena. Worlds are linked together by the Treasure Square Courtyard hub. Wario must clear both levels of a world before its world boss arena opens.
Excitement Central

The first world. A pastoral forest-and-ruins theme. Introduces the core mechanics in a relatively gentle difficulty curve. Enemy roster: Magons (small & large), Clubosaurs, Cractyls, Ankirons. World boss: DinoMighty’s Showdown.

Greenhorn Forest
Wario’s introductory level. A lush forest with tall trees, waterfalls, and a relatively open layout designed to ease the player into the Mad Moves system. The objects to collect are easier to spot than later levels, and the puzzles are tutorial-grade.
Enemies: Magons (small yellow lizards), Clubosaurs (large brutes), Cractyls (flying bird-types), and a single Ankiron (cannon-type).
Boss: Greenfist — a hulking green lizard with the lowest HP of any major boss. The tutorial boss for the Mad Moves system.
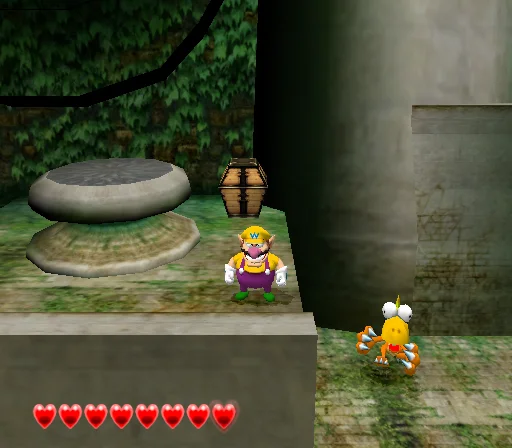
Greenhorn Ruins
Set inside ancient temple ruins hidden in the middle of the forest. The puzzle density steps up significantly here, with more sub-area navigation, more verticality, and the introduction of the Red Crystal Entity mini-boss type. Magons, Cractyls, Clubosaurs and Ankirons return, plus the unique area-specific Old Red-Mug enemy.
Boss: Sandworm — a burrowing antlion creature that ambushes Wario from beneath the ruins. Damaged by punch combos to the head.
Spooktastic World
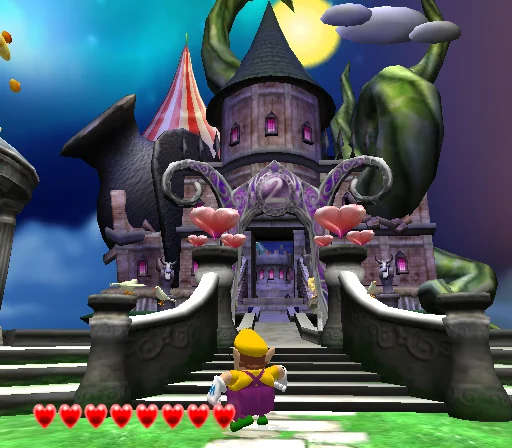
The second world. Haunted mansion and dark carnival themes. Significantly creepier visual identity than Excitement Central. World boss: Brawl Doll.

Horror Manor
A massive haunted mansion full of chain climbs, ghostly enemies, and basement areas. Introduces the Yellow Crystal Entity mini-boss type. Features Wario climbing massive chain segments to scale the mansion’s interior.
Enemies: ghosts and goblin-types unique to Spooktastic, plus the recurring big enemy types in horror-themed reskins.
Boss: Clown-a-Round — a giant clown-themed boss that fits the spooky-carnival vibe of the world.
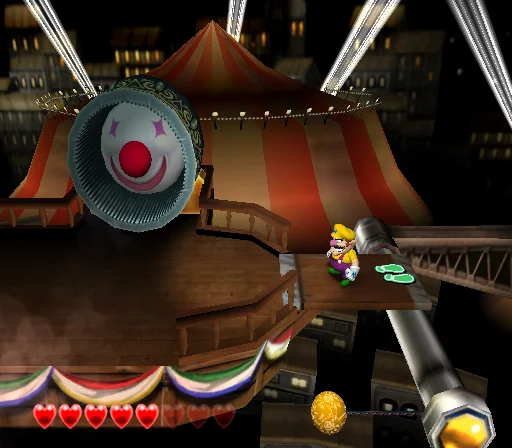
Wonky Circus
A dark, deranged circus complete with electrified clown fences, elephant chases, and an underground town section. One of the more visually distinctive levels in the game. The Red and Blue Crystal Entities both appear here as mini-bosses.
Boss: Dual Dragon — a two-headed dragon boss that uses both heads to attack Wario simultaneously.
Sparkle Land
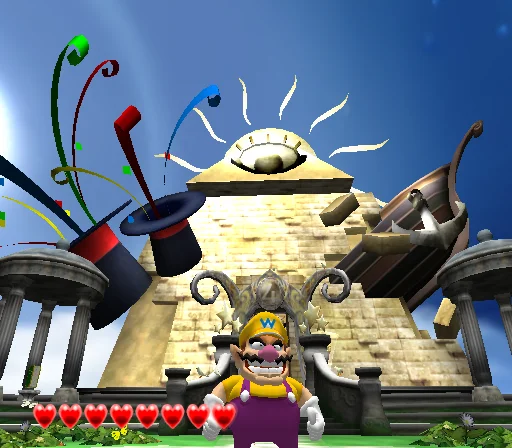
The third world. Snowy mountain peaks and beanstalk-climbing tropes. World boss: Mean Emcee.
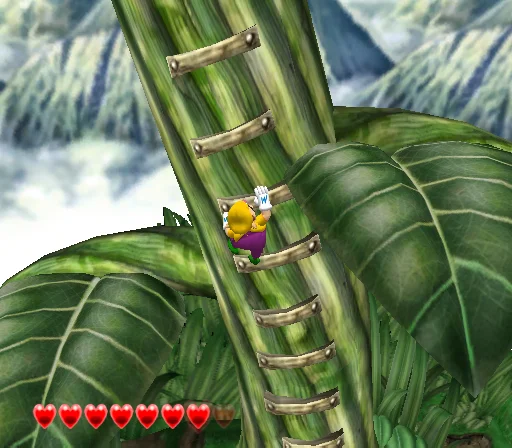
Beanstalk Way
A vertical climb up a colossal beanstalk into the clouds, with sub-areas accessible through clouds and floating platforms. Introduces the Blue Gem-Bodied Crystal Entity and the unique area-specific Tree Freak enemy.
Boss: Spideraticus — a giant arachnid that descends from above to attack Wario.
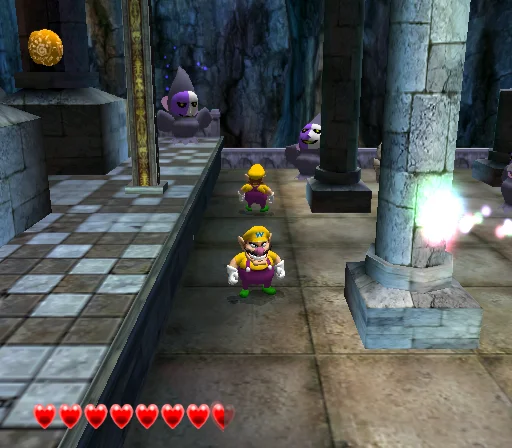
Mirror Mansion
A surreal hall-of-mirrors level filled with reflection-based puzzles and the area-unique Terrible Portrait enemy (paintings that come to life). Mirror Mansion has some of the trickier visual misdirection in the game.
Boss: Mean Emcee — the world boss; a giant carnival-MC themed boss controlling the Sparkle Land hub.
Pecan Sands
The final world. A blistering desert. Pecan Sands has its own ruined city aesthetic with sandstorm-blasted ruins, ancient stone formations, and the toughest enemy gauntlet in the game. World boss: Captain Skull.

Pecan Sands
The endgame world. Sandstorm-swept desert with treasure stations, the recurring Sandworm returning as a mid-boss, and brand new sand-themed enemies including Orange Pecan Gem-Bodied and Blue Pecan Gem-Bodied Crystal Entities. The hardest enemy waves in the Battle Rings appear here.
Mid-boss: Ironsider — a massive iron-clad construct boss.
World boss: Captain Skull — the final-act major boss whose key opens the final Huge Treasure Chest. Reclaim the last of the stolen wealth.
Items & Collectibles
Wario World has six main collectible categories per level, each with its own purpose. Collecting all of them rewards both ending quality and Wario’s long-term survival.
Collectibles & Pickups
| Item | Per Level | Purpose |
|---|---|---|
| Coin | Many | Dropped by enemies and wooden chests. Spent on garlic (200/continue) or Game Over revives |
| Garlic | Variable | Found in wooden chests or bought from Garlic Dispensers. Restores 1 heart of health |
| Red Diamonds | 8 per level | Hidden in sub-areas. Required to unlock the Stone Doohickey |
| Spritelings | 5 per level | Forest sprites locked in cages by the Black Jewel. Rescue all 40 for the best ending |
| Statue Pieces | Variable | Fragments of Gold Statues, floating on flying bases. Collect all in a level to assemble a Gold Statue |
| Gold Statues | Multiple | Assembled from Statue Pieces. Each adds half a heart to Wario’s max HP |
| Treasures | 8 per level | Wario’s stolen riches. Hidden in 8 coloured chests behind matching colour treasure buttons. Required to unlock the next world |
The Spritelings
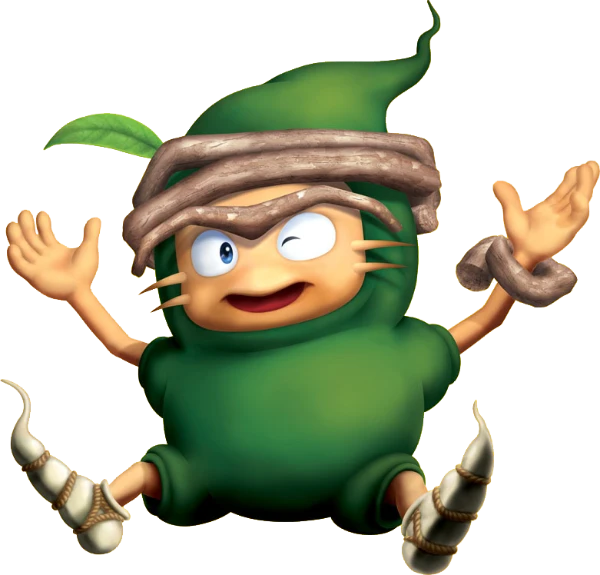
Spritelings are the forest spirits captured by the Black Jewel. There are 5 per level, each a different colour, locked in cages scattered throughout each course. Free them by approaching their cage and punching it open. They thank Wario and run off home.
The 40 Spriteling count is what determines Wario’s ending state (see the Endings section above). Saving all 40 is the only way to see the canonical “best ending” with Wario back in his golden castle surrounded by his recovered treasures.
Blocks
Various block types serve as platforms, puzzles, and obstacles throughout the levels. Each behaves differently and tests different aspects of Wario’s movement.
| Block | Behaviour |
|---|---|
| Arrow Block | Gray block with four red arrows on each side. It moves in whichever direction it’s pushed |
| Drop Block | Steel-blue anvil-shape block. Falls slowly while Wario stands on it — keep moving or it drops out from under him |
| Marshmallow Block | Puffy white block that shrinks and disappears almost immediately after Wario stands on it. Used for split-second platforming |
| Rock Block | Tan blocks with a crack and a bandage on one side. Only destroyed by attacking the bandage side — a directional puzzle |
| Brick / Stone blocks | Standard breakable blocks; Wario’s punch or ground pound destroys them |
| Switch Blocks | Stand-on or punch-to-activate; toggle various level events |
Objects & Obstacles
Beyond blocks, the levels are filled with interactive objects and hazards. Below: the recurring ones across all 8 levels.
Sprayable / Interactive Objects
| Object | Behaviour |
|---|---|
| Bomb | Auto-explodes after a few seconds. Ankirons throw the angry-faced variant; smiley-faced bombs come from wooden chests |
| Bowling Pin | Flame-shaped pins; destroyed by bombs. Often arranged in clusters as puzzle elements |
| Bunny Spring | Rabbit-shaped trampoline that propels Wario sky-high after a Ground Pound activation |
| ByeBye Balloon | Glue Globe attached to balloons. Grab it to transport Wario between different sections of a level |
| Clown Missile | Giant clown-faced cannonball. Can knock Wario into pits |
| Column | Large pillars; Wario can pull them down to execute Mad Moves on bosses |
| Cyclone Generator | Weathervane device that creates cyclones when punched. Wind hazard for movement puzzles |
| Enemy Generator | Bulbous porcelain-patterned object that spawns continuous enemy waves. Defeating waves eventually destroys it |
| Glue Globe | Sticky orb Wario can grab to attach to enemies or surfaces |
| Garlic Dispenser | Coin-operated machine. Pay coins for garlic to restore health |
| Wooden Chest | Contains coins, garlic, or items. Punch or smash to open |
| Coloured Chest | 8 per level, each holding one of the 8 stolen treasures. Opens only via the matching coloured treasure button |
| Treasure Button | 8 colour-coded buttons hidden in each level. Each unlocks its matching chest. The puzzle is finding all 8 |
| Sub-area Portals | Hidden side-rooms; entered via specific environmental triggers, contain Red Diamonds and Spritelings |
| Unithorn’s Lair | Bonus rooms inside each level with mini-arena combat puzzles. Bombs spawned inside come from these lairs |
Enemies
Wario World features a unique enemy roster for each of its 8 levels — with Greenhorn Forest and Greenhorn Ruins being the only exception (they share the Excitement Central roster). According to the Japanese Shogakukan strategy guide, every level’s enemy set fits into 5 recurring functional types, each scaling in difficulty as the player progresses.
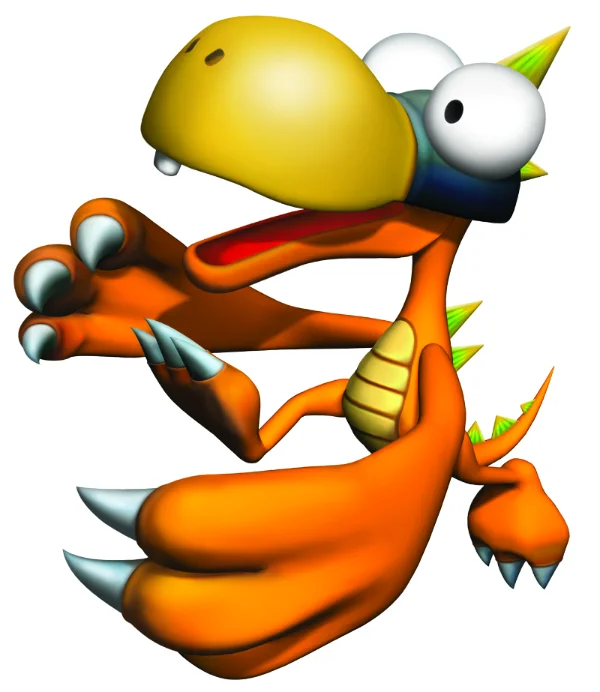
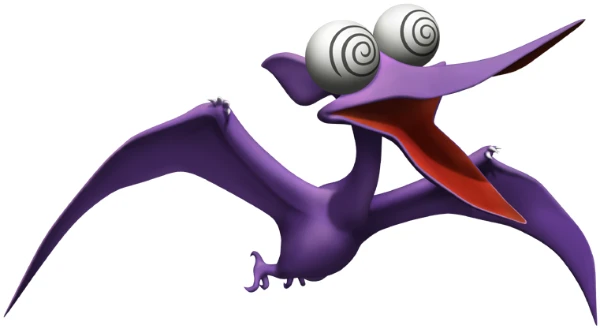
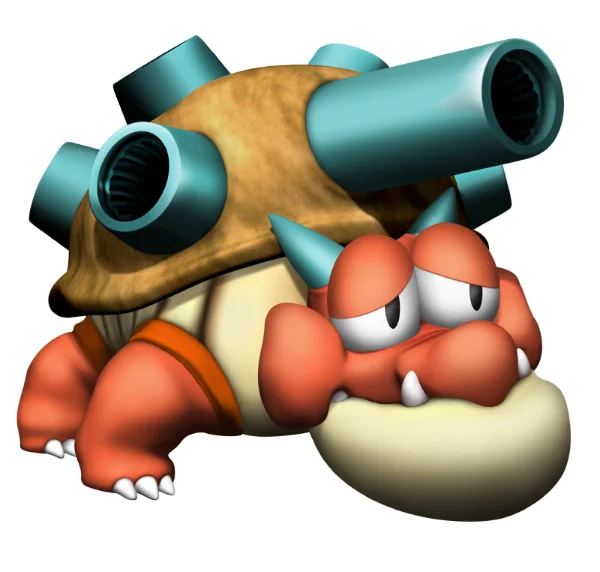
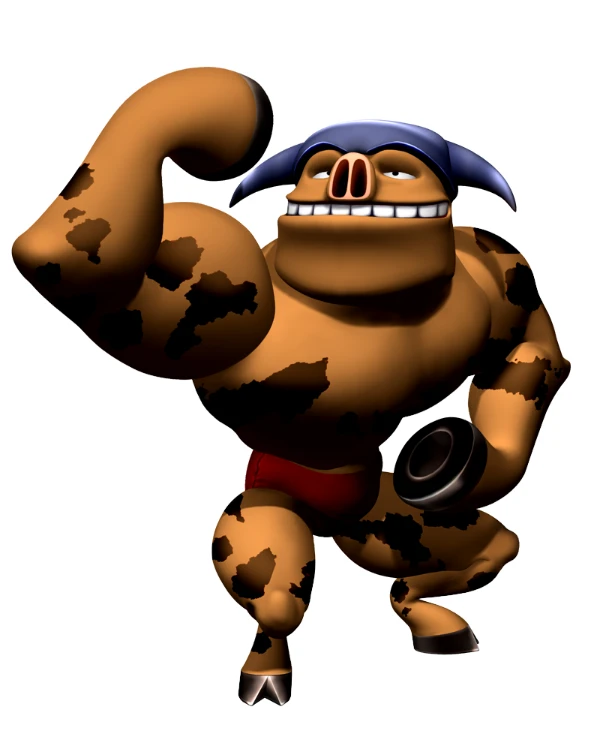
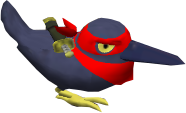
The 5 Recurring Enemy Types
Every level’s roster contains one enemy from each of these functional categories, just reskinned and rebalanced for the level’s theme:
| Japanese Type | Function | Example |
|---|---|---|
| 小型 (kogata) — small type | Standard ground enemy; quick but fragile | Small Magon (Excitement Central) |
| 中型 (nakagata) — medium type | Tougher mid-tier ground enemy | Large Magon (Excitement Central) |
| 大型 (ōgata) — large type | Bulky bruiser; high HP, slow attacks | Clubosaur (Excitement Central) |
| 鳥型 (torigata) — bird type | Aerial threat; dives at Wario from above | Cractyl (Excitement Central) |
| 大砲型 (taihōgata) — cannon type | Long-range projectile attacker; throws bombs | Ankiron (Excitement Central) |
Beyond these recurring types, each level has its own area-specific unique enemy (Old Red-Mug, Tree Freak, Terrible Portrait, etc.) that doesn’t fit the 5-type framework. Red-Brief J is a recurring nemesis who appears across multiple levels as a Wario-specific rival.
Combat Approach
Most enemies can be defeated by simple punching or dash-attacking, but Wario’s real fun comes from stunning them first (with a Dash Attack into a Punch combo), then picking them up and using them as Mad Move ammunition. This is the only way to damage many bosses, so the enemy roster effectively doubles as boss-fight ammunition.
Mini-Bosses & Battle Rings
Every level except Greenhorn Forest features mini-bosses in specific sub-areas. Wario can’t progress through the gate until they’re defeated. Unlike the main bosses, mini-bosses don’t re-spawn when Wario returns to a cleared level.
The Battle Ring
Every level except Greenhorn Forest contains a Battle Ring — a 60-second mini-arena where Wario must defeat as many waves of enemies as possible before the timer expires. The more enemies he flattens, the more coins rain down at the end of the round. A pure combat showcase to flex the Mad Moves system.
The Crystal Entities
The signature mini-boss type. Three colour variants appear across the game, each with different attack patterns. All three are giant crystal-bodied creatures that fire laser beams and continuously spawn smaller Crystal Creatures to attack Wario.
| Crystal Entity | Attack Pattern | Appears In |
|---|---|---|
| Red Crystal Entity | Vertically sweeping laser beams; spawns Crystal Creatures | Greenhorn Ruins, Horror Manor, Wonky Circus |
| Yellow Crystal Entity | Multiple parallel beams in a straight line | Horror Manor, Shivering Mountains, Pecan Sands |
| Blue Crystal Entity | Bursting/radial beam pattern | Wonky Circus, Beanstalk Way, Mirror Mansion |
Unithorn’s Lair
Each level contains a Unithorn’s Lair sub-area — a small puzzle/combat chamber containing a unicorn-themed enemy spawner. These rooms have unique geometry, special enemies, and exclusive treasures. Often gated behind specific tasks (smashing a column, finding hidden buttons, etc.).
Major Bosses
Wario World features 10 major bosses across its 8 levels and 4 worlds. Each is designed in Treasure’s distinctive arcade-action style — large, visually striking, and almost all requiring the Mad Moves system to damage. Standard attacks are useless against most of these bosses.
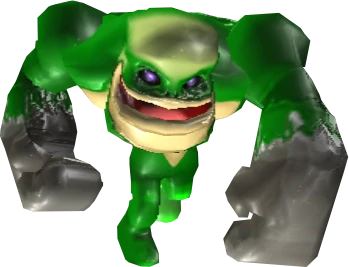
Greenfist
Greenhorn Forest • World 1, Level 1
A hulking green lizard creature — the game’s first boss and tutorial in the Mad Moves system. He attacks with powerful punches and tackles, but has the lowest HP of any major boss. Greenfist establishes the standard boss-fight rhythm: stun a smaller enemy, pick it up, hit Greenfist with a Mad Move.

Sandworm
Greenhorn Ruins • World 1, Level 2
A burrowing antlion-like monster with scythe-arms. Erupts from below to ambush Wario, then digs back underground between attacks. Returns later in Pecan Sands (downgraded to mid-boss status). One of the rare bosses that can be damaged by standard attacks — simply punch combos to the head.
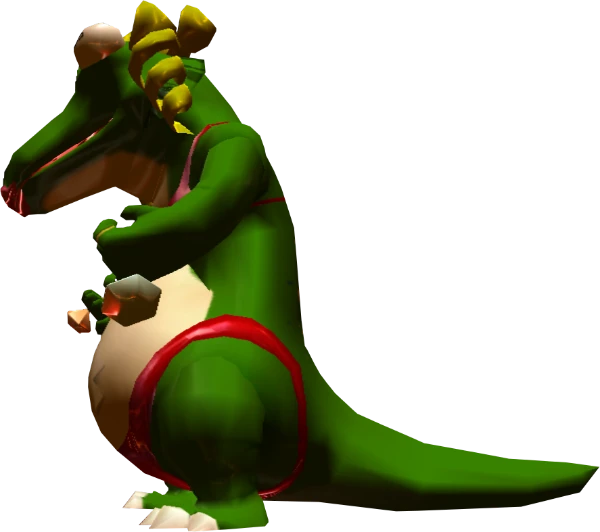
DinoMighty
World 1 Boss • DinoMighty’s Showdown
The first world boss — a dinosaur-themed wrestler with powerful body slams and stomp attacks. Has her own dedicated boss arena (DinoMighty’s Showdown). Wario must use Mad Moves on her, but her dedicated weakness is throwing a stone pillar onto her toe — causing her to recklessly rampage, exposing herself to follow-up attacks.

Brawl Doll
World 2 Boss • Spooktastic World
A massive haunted doll boss — the Spooktastic World boss. Has an eerie staring face and ragdoll-style attacks that swing limbs at Wario across the arena. One of the most visually distinctive bosses thanks to Treasure’s creep-out factor.

Clown-a-Round
Horror Manor • World 2, Level 1
A giant clown-themed boss that fits the dark-circus aesthetic of the Spooktastic World. Throws spinning juggling props at Wario and uses circus-themed environmental hazards.

Dual Dragon
Wonky Circus • World 2, Level 2
A two-headed dragon boss that uses both heads to attack Wario simultaneously. Each head has its own attack pattern; they can fire breath attacks together for double-pressure phases. Wonky Circus’s boss.

Winter Windster
Shivering Mountains • World 3, Level 1
The snowy-mountain boss. A massive wind/ice-themed enemy that uses wind gusts to inflate Wario into a balloon (a memorable visual gag) and float him helplessly around the arena.

Spideraticus
Beanstalk Way • World 3, Level 2
A giant arachnid boss that descends from above to attack Wario from his web. Crawls along the ceiling and rappels down on web threads, then retreats up before counter-attack.

Ironsider
Pecan Sands • World 4 (Mid-Boss)
A massive iron-clad construct mid-boss in the final world. Heavy armor renders standard attacks completely useless — every successful hit must come from a Mad Move using a picked-up smaller enemy as ammunition.

Captain Skull
Pecan Sands • Final World Boss
The final major boss — the Pecan Sands world boss who guards the last of Wario’s stolen treasure. A skull-themed pirate captain with multiple attack phases and the largest health pool in the game. Defeating Captain Skull triggers the closing confrontation with the Black Jewel itself in the Treasure Square Destroyed phase.
WarioWare Microgame Demos
One of Wario World’s most beloved bonus features is its unlockable WarioWare microgame demos.
The WarioWare Demo System
- Each time the player collects all 8 treasures in a level, a demo set of microgames from WarioWare, Inc.: Mega Microgame$! is unlocked
- The demos can only be played by transferring them to a Game Boy Advance via Link Cable
- Once downloaded, the GBA can be disconnected and retains the microgames until powered off
- 8 total sets of microgames are unlocked (one per main level)
- Each set is accessible from the Treasure Square hub
- The demos can be played infinitely once downloaded — no boss stages, just the microgames
The 8 Microgame Sets
| Set | Microgames Included |
|---|---|
| Trial Ver. 1 | Crazy Cars, Saving Face, Wario Whirled, Repellion, Dodge Balls, The Maze That Pays, Mug Shot |
| Trial Ver. 2-8 | Additional rotating selections from the full WarioWare game — a way to preview the GBA title that launched alongside Wario World in 2003 |
Why It Matters
This was effectively a cross-promotional bundle for the Wario Land franchise expansion of the early 2000s. WarioWare, Inc. launched on GBA in 2003 just before Wario World, and Nintendo used the Cube/GBA Link Cable to bridge the two Wario games. Wario World remains one of the few GameCube titles where the GBA Link Cable functionality is core to a meaningful bonus content unlock.
Note: The microgame demo system does not function when playing Wario World on Nintendo Switch 2 via Nintendo Classics, due to the GBA Link Cable hardware no longer being available.
Development Staff
Wario World was developed by the legendary action-game studio Treasure, published by Nintendo, and represents one of the more notable cross-studio Mario-universe partnerships of the GameCube era.
- Developer: Treasure (Tokyo, Japan)
- Publisher: Nintendo
- Platform: Nintendo GameCube exclusive
- Treasure’s Legacy: Founded in 1992 by former Konami staff, Treasure was already legendary by 2003 thanks to Gunstar Heroes, Dynamite Headdy, Mischief Makers, Sin & Punishment, Ikaruga, and the Bangai-O series. Their signature: high-action arcade-style design with dense combat mechanics
- Producer: Hitoshi Yamagami (Nintendo)
- Director: Treasure development team — specifics credited in the in-game staff roll
- Wario Voice: Charles Martinet (uncredited but established Wario voice actor by 2003)
- Rating: ESRB E (Everyone) for North America; PEGI 3+ for Europe
- Re-releases: Player’s Choice budget label in 2004; available via Nintendo Switch Online + Expansion Pack as part of the Nintendo GameCube — Nintendo Classics service on Switch 2
Reception & Legacy
Wario World received fairly positive reviews but with a near-universal caveat: the game is too short.
Critic Scores at Launch
- IGN (Matt Casamassina): 7.1/10 — “Like Luigi’s Mansion, what’s there is good. I just wish there was more of it. I can definitely recommend Wario World as a great rental”
- GameSpot: noted that the game’s length and simplicity couldn’t hold the player’s attention for more than a day
- GameSpy: “the game offers a little beyond of what the regular tridimensional games offers, however, what is offered is short and repetitive”
- Play Magazine: Perfect score — “Wario World pays off every second the player holds the controller, and that is greatness”
- Game Informer: Specifically praised the boss battles as standouts
Critical Consensus
Critics universally praised the gameplay quality — the combat system, the Mad Moves loop, Treasure’s boss design, the unique enemy roster, and the moment-to-moment action. The criticism was almost entirely about length: an experienced player can finish the main game in 6–8 hours, and completionists clear all 40 Spritelings and treasures in under 15 hours. For a console release at full retail price in 2003, that was below the era’s expectations for Mario-universe games.
Sales
- 256,000+ copies sold in the United States
- 142,000+ copies sold in Japan
- Player’s Choice re-release in 2004 — priced at a budget tier alongside Mario Golf: Toadstool Tour. The re-release helped extend the long-tail sales of the title significantly
Retrospective Position
Wario World has settled into a beloved cult-classic status in the Mario fandom — particularly among Treasure aficionados, who consider it one of the studio’s best 3D efforts. The brevity that critics complained about at launch has become part of its appeal: an arcade-action package you can finish in a weekend, with every level packed with tight, distinct combat sequences. Wario himself would never quite return to this gameplay style — subsequent Wario titles returned to handheld 2D Land games and WarioWare microgame compilations.
Trivia
- Wario’s first console adventure. Up to this point Wario had appeared in handheld titles (Wario Land 1-4 on Game Boy and GBA). Wario World was his first appearance as the protagonist of a 3D home-console game
- The ONLY 3D Wario action-platformer. No subsequent Wario title returned to the Wario World gameplay template. Wario’s mainline outings since have been 2D handheld (Wario Land: Shake It!, Master of Disguise) or microgame compilations (WarioWare series)
- Developed by Treasure. The Tokyo-based studio behind Gunstar Heroes, Sin & Punishment, Ikaruga, and Dynamite Headdy. One of the few first-party-published Mario-universe games developed by an outside studio
- The Mad Moves system is unique to Wario World. Stun-and-pickup-and-throw combat using regular enemies as ammunition for boss damage is the defining gameplay loop and has never been replicated in another Mario-universe game
- The 6-ending Spriteling system directly callbacks the Wario Land tradition of variable castle quality based on collection completion
- The unique enemy roster per level means Wario World has more visually distinct enemies than most Mario games of the GameCube era, with the trade-off that almost none of them appear in subsequent titles
- WarioWare GBA Link Cable demos: Wario World launched alongside WarioWare, Inc.: Mega Microgame$! on Game Boy Advance, and the two games connect via Link Cable for unlock-and-transfer microgame demos. One of the most ambitious GBA/GameCube connectivity uses of the era
- Wario’s 200-coin Game Over revival mechanic is unique to Wario World — a perfect distillation of his greed-driven character that no other Mario-universe game uses
- The Crystal Entity mini-boss system (Red, Yellow, Blue variants across multiple levels) is a Treasure design hallmark — the same colour-coded recurring-boss design appears in Gunstar Heroes and other Treasure titles
- Hyper Suction (the long-distance coin/garlic vacuum) appears nowhere else in the Wario or Mario series
- Player’s Choice re-release in 2004 alongside Mario Golf: Toadstool Tour. The budget pricing extended the game’s sales tail considerably and made it the go-to introductory Wario console game for many GameCube owners
- Wario’s castle in the opening cutscene is one of the most explicitly stated character-building moments in Wario’s history — the instruction booklet text frames him as openly bragging about his stolen wealth, immediately puncturing any goodwill from sympathetic players
- The game has 40 total Spritelings (5 per level × 8 levels). The exact rescue-count thresholds for each ending tier (1, 2-10, 11-20, 21-30, 31-39, 40) are some of the strictest ending-trigger thresholds in any Mario-universe game
- IGN’s reviewer Matt Casamassina compared the game favourably to Luigi’s Mansion — another GameCube Mario-universe spinoff that drew similar “short but well-made” reviews
- The Treasure Square hub world physically transforms across the game as Wario clears worlds. By the endgame it has visibly degraded into the “Treasure Square Destroyed” state where the final confrontation takes place
- The game contains no Mario, no Luigi, no Princess Peach appearances. It’s the rare Mario-universe game where the standard Mushroom Kingdom cast simply isn’t present
- Red-Brief J, the recurring rival enemy, is one of the few Wario World enemies to appear in subsequent Wario media — his strange Speedo-clad design has become a minor fandom icon
- The game shares a 2003 release window with several other Mario-universe GameCube releases including Mario Kart: Double Dash!!, Mario Party 5, and Mario & Luigi: Superstar Saga on GBA. A peak Mario-universe year
- The Captain Skull final boss is one of Treasure’s most visually striking GameCube-era boss designs — a multi-phase skull-pirate showdown that critics specifically praised
- The Pecan Sands desert visuals are deliberately reminiscent of Wario Land 4’s “Crescent Moon Village” aesthetic — a quiet visual nod to Wario’s GBA roots
Reference / Information
Sub-pages, guides, and walkthroughs for Wario World.
Media / Downloads
Box art gallery and screenshots for Wario World.