
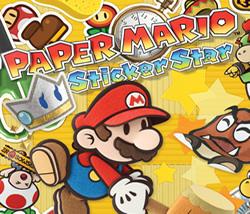
Paper Mario: Sticker Star
Paper Mario’s first handheld outing reinvented the series with a sticker-based combat system, a hand-crafted papercraft world, and six themed kingdoms culminating in a showdown with a Royal-Sticker-empowered Bowser. With companion Kersti, a roll-call of single-use sticker attacks, and reality-bending Thing stickers cut from real-world objects, Sticker Star is the most divisive entry in the series — celebrated for its visual creativity and album-management puzzles, criticised for sidelining the franchise’s classic partners and RPG progression. This page covers the full game in depth: every Royal Sticker chapter, every boss, every world, every cross-game reference, and the Hidden Luigi cameos most players miss.
Overview
Released worldwide between November and December 2012, Paper Mario: Sticker Star is the fourth entry in the Paper Mario series and the first to launch on a Nintendo handheld. Developed by Intelligent Systems, the same team behind the original Paper Mario on the Nintendo 64, the game replaced the partner-driven turn-based RPG framework of its forebears with a streamlined battle system built around single-use stickers. Every attack — from a basic jump to a giant fan or a gilded scissors — is peeled off Mario’s sticker album, used once, and gone. Coins replace experience points, HP-Up Hearts replace level-ups, and the partners that defined the earlier games are gone entirely, with Kersti, a wise-cracking sticker fairy, serving as Mario’s sole companion for the journey.
The story sends Mario across six themed worlds — grasslands, desert, woodlands, snow, jungle and volcano, plus a sky castle — chasing the six Royal Stickers that Bowser shattered when he crashed the annual Sticker Fest in Decalburg. Along the way Mario picks up Thing stickers cut from real-world objects (a vacuum cleaner, a fan, a soda can) which become enormous, often surreal attacks. Sticker Star sold well over two million copies and influenced the design direction of every subsequent Paper Mario entry, including Paper Mario: Color Splash on Wii U and Paper Mario: The Origami King on Switch.
Story
The night of the annual Sticker Fest brings the residents of Decalburg into the town square to witness the descent of the Sticker Comet — a celestial body said to grant every wish made beneath it. Princess Peach, Mario and a crowd of Toads have gathered to celebrate when Bowser and his troops gatecrash the festival to claim the comet for themselves. When Bowser touches it, the comet shatters into six Royal Stickers, scattering across the kingdom; one lands on Bowser’s own head, dramatically increasing his power. He brushes aside Mario’s attempt to stop him, and Mario blacks out.
Mario wakes to a ruined festival, a missing princess and a frightened crown-shaped fairy hovering overhead. The fairy — Kersti, the comet’s caretaker — initially blames Mario for the disaster before realising Bowser was responsible. She agrees to help him hunt down the Royal Stickers, teaching him along the way how to paperize: flatten the world into a flat sheet, peel objects free, and stick down new ones to manipulate the environment. From Decalburg’s hub, Mario and Kersti set out into six successive worlds, each ending in a confrontation with a guardian who has fused with one of the Royal Stickers. Bowser Jr. and Kamek harry the pair throughout, the Toads of Decalburg slowly return as Mario rescues them, and the trail leads at last to Bowser’s Sky Castle for the climactic five-stage battle in which Princess Peach has been taped to a chain above the throne.
The Six Royal Stickers
The Sticker Comet shatters into six Royal Stickers, one for each world. Each is held by a guardian boss, and recovering the set is the central goal of the game. Each Royal Sticker also grants Mario a special ability he can deploy in the world map’s Sticker Museum and during chapter transitions.
Megasparkle Goomba
World 1 — Goomba Fortress
The first Royal Sticker is wedged onto the head of a fortress-mounted Megasparkle Goomba, a fused composite of a stack of regular Goombas. The fight rewards repeated hits to its base, and the Sticker glitter trail that drifts from the fortress sets the visual signature for every subsequent Royal Sticker boss.
Tower Power Pokey
World 2 — Drybake Stadium
Atop the desert pyramid stadium, Mario climbs a five-segment Pokey clad in gold and crowned by the second Royal Sticker. The fight encourages stickers that hit multiple sections at once — and is one of the earliest boss encounters that strongly nudges players toward a particular Thing sticker (the Baseball Bat) to survive efficiently.
Gooper Blooper
World 3 — Whitecap Beach
Kamek’s tampering has bonded the third Royal Sticker to a colossal Gooper Blooper terrorising the coast. The Faucet Thing sticker provides the most decisive answer to the fight, fitting the seaside setting and demonstrating Sticker Star’s signature “the right Thing solves the problem” boss design.
Mizzter Blizzard
World 4 — Bowser’s Snow Fort
The fourth chapter ends with the Royal Sticker bound to Mizzter Blizzard, an immense snowman conjured into a Bowser-shaped statue. The two-phase encounter requires Mario first to topple the statue and then to dismantle the singing snowman beneath, with fire-themed and fan-themed Thing stickers proving essential.
Petey Piranha
World 5 — Rumble Volcano
The volcano world’s guardian, Petey Piranha, swallows Kersti at the start of the fight — locking Mario out of the Battle Spinner and forcing him to fend off Petey’s spiky bubbles with whatever stickers he brought in. Spitting Kersti free restores the Spinner and turns the tide. Rumble Volcano’s lava-stage gauntlet leading to the fight is one of the game’s tightest design showcases.
Bowser
World 6 — Bowser’s Sky Castle
The final Royal Sticker is fused directly into Bowser, supercharging him for a five-stage finale. Whomps, Lava Bubbles and a Chain Chomp guest at different phases of the fight; Princess Peach is taped to a chain above the throne; and the showdown peaks with the Royal Sticker freed and the comet restored to wish-granting form.
The Six Worlds
Sticker Star divides its adventure into six themed worlds plus the Decalburg hub. Worlds are unlocked sequentially as Royal Stickers are collected. Each is split into a handful of levels — combinations of platforming, puzzle and combat — connected on a 2D map screen, with alternate Comet Pieces in some stages opening secondary paths.
World 1 — Warm Fuzzy Plains, Hither Thither Hill, Goomba Fortress
Grasslands chapter · ends with Megasparkle Goomba
Mario starts at Warm Fuzzy Plains, where a Toad stumbles into him and drops a special Scissors sticker. Bowser Jr. takes immediate offence, demands the sticker, loses the fight, and crumples up the bridge ahead — establishing the game’s central trick: crumpled scraps of scenery must be flattened back out via paperization. Kersti teaches the technique here. The world progresses through Water’s Edge Way, the bog-and-boardwalk Bouquet Gardens, Hither Thither Hill (whose alternate Comet Piece unlocks an optional Big Buzzy Beetle fight), and Whammino Mountain, before culminating at Goomba Fortress and the Megasparkle Goomba. Hidden Luigi: at the end of the bridge to the Goomba Fortress tower, Luigi sits on the wall.
World 2 — Drybake Desert, Yoshi Sphinx, Sandshifter Ruins, Damp Oasis, Drybake Stadium
Desert chapter · ends with Tower Power Pokey
The second world opens at Drybake Desert, where Mario scales a pyramid and finds a tablet piece in a hidden chest. The route winds through the outside and inside of the Yoshi Sphinx (Kamek’s second appearance and defeat), the underground maze of Sandshifter Ruins, and a secret route to Damp Oasis where a sandstorm must be stopped. Three tablet pieces unlock Drybake Stadium itself — Kamek had folded the building flat — and Mario climbs to the rooftop arena to fight Tower Power Pokey for the second Royal Sticker. Hidden Luigi: at the outdoor section of the fourth floor of Drybake Stadium, Luigi appears in a window on the right.
World 3 — Leaflitter Path, The Bafflewood, Wiggler’s Tree House, Loop Loop River, Tree Branch Trail, Whitecap Beach
Woodlands and coast chapter · ends with Gooper Blooper
The forest chapter opens with a sleeping Wiggler on Leaflitter Path; he wakes hungry, explains the woods have been poisoned, and asks Mario for help. Following him through The Bafflewood maze, Wiggler is snatched by Poison Bloopers. At his Tree House, Mario discovers Wiggler has been segmented into five by Kamek’s magic, with four pieces fled into the surrounding stages. Mario tracks them down across Loop Loop River, Tree Branch Trail and the surrounding woods — each fight is against a Wiggler Segment — before reassembling him and proceeding to Whitecap Beach for the Gooper Blooper boss. The Wiggler search is the game’s most emotionally invested arc and a high point for many critics. Hidden Luigi: at the end of the broken pier on Whitecap Beach, Luigi sits on a rock in the distance.
Surfshine Harbor — interlude hub
Cross-chapter waystation
Between Worlds 3 and 4, Surfshine Harbor serves as a hub for sea-bound progress. The Toad-built town is where the Big Cheep Cheep boss fight occurs (one of the game’s mid-game roadblocks), and where Mario picks up gear and stickers for the cold chapter ahead.
World 4 — Shy Guy Jungle approach, Snow Rise, Whiteout Valley, The Enigmansion, Bowser’s Snow Fort
Snow chapter · ends with Mizzter Blizzard
The snowy fourth world includes The Enigmansion, a haunted manor whose steward asks Mario to collect and reseal 100 Boos into the Book of Sealing. Kamek admits — after the task is done — that he caused the haunting by tearing out pages while searching for a novel about stickers. He crumples the pages into a Big Boo and flees. After defeating the Big Boo and replacing the book, the steward gifts Mario the Forebear’s Portrait, which Mario uses at Whiteout Valley to fill a wall hole and start the ski lift. The chapter ends at Bowser’s Snow Fort with the Mizzter Blizzard / Bowser Snow Statue fight for the fourth Royal Sticker. Hidden Luigi: near the top of the Whiteout Valley ski lift, Luigi rides a chair going downward.
World 5 — Shy Guy Jungle, Long Fall Falls, Chomp Ruins, Rugged Road, Rumble Volcano
Jungle and volcano chapter · ends with Petey Piranha
The jungle world has Mario restoring bridges whose pieces have been stolen by Spear Guys, navigating a treacherous raft down Long Fall Falls while a Mega Cheep Chomp gives chase, and waking a giant Chain Chomp at Chomp Ruins. The chapter climbs to Rugged Road on the slopes of a volcano, then descends inside Rumble Volcano where Mario falls into a pit and Petey Piranha eats Kersti. The Battle Spinner is locked out until Mario spits Kersti free mid-fight, after which the Royal Sticker is recovered. Hidden Luigi: in Rugged Road, after the Save Block area, volcanic debris falling through the floor reveals an underground hot springs where Luigi soaks.
World 6 — Gate Cliff, Bowser Jr.’s Flotilla, Bowser’s Sky Castle
Sky castle finale · ends with Bowser
At Gate Cliff the five collected Royal Stickers react together; placing them on the wall and paperizing reveals Bowser’s hidden castle, which immediately flies into the sky. With Flutter (the matured Wiggler) carrying Mario, the pair board Bowser Jr.’s Flotilla — a multi-airship gauntlet — for the final Bowser Jr. fight, then reach Bowser’s Sky Castle. After dispatching Kamek a third and final time, Mario climbs to the throne room for the five-stage Bowser showdown, with Whomp, Lava Bubble and Chain Chomp guest enemies, ending with the sixth Royal Sticker freed.
Gameplay
Sticker Star presents its world from a hybrid perspective: the overworld is presented in three-dimensional papercraft with characters as flat cutouts, while levels are navigated linearly along scripted paths with the 3DS’s stereoscopic 3D used to emphasise the paperiness of the environment. Rather than a connected open hub of the earlier Paper Marios, Sticker Star uses a world-map screen at chapter level, with each completed stage marked by the Comet Piece it yielded. Some stages contain alternate Comet Pieces that, when collected, unlock additional branches or optional fights.
Stickers themselves drive almost every interaction. Mario picks them up by peeling them from the environment, buying them from sticker shops, or receiving them from defeated enemies. Each sticker occupies a slot in his finite album — slot count grows over the game as Mario finds upgrades — and is consumed when used, whether to attack in combat or to solve a puzzle. The album doubles as inventory, with stickers sorted into categories: standard attacks, multi-use stickers, status stickers, shiny variants and Thing stickers. Mario does not level up; instead, scattered HP-Up Hearts permanently raise his maximum HP by five and his first-strike bonus by one per heart collected.
Paperization
Kersti’s signature ability lets Mario flatten the current scene into a 2D sticker-book page, peel objects free of their context, and stick down items from his album. Paperization unlocks much of the game’s puzzle design: a missing bridge can be replaced from a Thing sticker; a tablet piece pulled from one wall might be placed onto another to open a door; an ill-tempered sleeping enemy can be peeled off the landscape and used elsewhere. It is also the means by which Hidden Luigis are coaxed out of their backgrounds.
Things
Things are real-world household objects scattered across stages — vacuum cleaners, electric fans, faucets, scissors, baseball bats, soda cans, lamps. Mario carries them at full size in his inventory until he reaches a Sling-a-Thing location, where each Thing is processed into a sticker — usually a wildly oversized one. Things are essential for solving certain puzzles and for trivialising particular boss fights: Tower Power Pokey hates the Baseball Bat; Gooper Blooper folds before the Faucet; Mizzter Blizzard melts to the Fire Extinguisher. The game holds only one of each Thing in inventory at a time, in either its raw or sticker form.
Battle System
Combat returns to the menu-based, turn-by-turn structure of the first two Paper Marios, but with stickers replacing the action commands and party-based attacks. Each battle starts with a turn order — Mario almost always acts first if he ambushed the enemy on the overworld, last if he was ambushed himself — and the player chooses a sticker from the album for each action. The selected sticker plays its animation, is permanently consumed from the album, and Mario’s turn ends.
Action Commands carry over from earlier entries: pressing A at the moment of impact on a Jump or at the moment of contact on a Hammer increases damage. Multi-hit stickers like the Shiny Hopslipper require a full button-press chain to maximise damage. Status stickers can poison, sleep, immobilise or shrink the enemy, but they generally cost a slot Mario could spend on raw damage.
The Battle Spinner
The Battle Spinner is Kersti’s contribution to combat: spending coins, Mario can spin one, two or three reels to roll bonus sticker slots. Matching three identical stickers unleashes their multi-shot use; mismatched results give Mario two or three separate stickers to use in a single turn. The Spinner is the closest Sticker Star comes to a party system, and is locked out during the Petey Piranha fight while Kersti is swallowed.
Coins, HP and Rewards
Battles award only coins (no experience). Mario keeps coins through paperization and uses them at shops to buy new stickers, at HP refresh blocks, and at the Battle Spinner. Defeating bosses awards their Royal Sticker (chapter-defining) plus a generous coin payout; defeating regular enemies awards coins scaled to the danger of the fight. Running from battle (an option introduced in the first turn) costs Mario a small coin penalty and forfeits any rewards.
Characters
Sticker Star strips back the main cast to its core. Mario is the only playable character; Kersti is his sole travelling companion; partners, in the sense the earlier Paper Mario games used the word, do not exist.
Protagonists & Allies
Mario
The silent, jumping, hammer-swinging hero. Mario gains a starting Hammer at the very beginning of the game; HP-Up Hearts found in stages raise his maximum HP throughout the journey. He cannot speak directly, but Kersti translates his shrugs, frowns and headshakes for the player.
Kersti
The crown-shaped sticker fairy who serves as caretaker of the Sticker Comet. Initially abrasive toward Mario, she warms across the journey, supplies stickers when his album runs dry, teaches paperization, and provides the Battle Spinner. Kersti is swallowed by Petey Piranha during the World 5 boss fight, and in the game’s emotional climax sacrifices herself to restore the comet, only to be revived at the curtain call.
Princess Peach
Carried off during the Sticker Fest, Peach spends most of Sticker Star offscreen, taped to a chain in Bowser’s throne room. She has no playable segment but is the goal of the rescue narrative.
Toads of Decalburg
The Toads of Decalburg are scattered throughout the world by the comet’s shattering. Each rescued Toad returns to the hub and contributes to its rebuilding — providing services, opening shops, and showing the town’s gradual recovery as Mario’s progress unfolds.
Wiggler / Flutter
The Wiggler of Leaflitter Path is a friendly, hungry guardian of the forest who is segmented by Kamek into five Wiggler Segments. Mario reunites him in World 3; in World 6 he reappears as Flutter, his butterfly form, and carries Mario up to Bowser Jr.’s Flotilla.
Enigmansion Steward
A book-loving Toad who acts as caretaker of The Enigmansion. He commissions Mario to recapture the Boos and ultimately gifts him the Forebear’s Portrait.
Antagonists
Bowser
The architect of the Sticker Fest disaster. After absorbing one of the Royal Stickers, Bowser is permanently silent throughout the game — he doesn’t issue a single line of dialogue, lending the final showdown a strange, unsettling weight. The fight against him is divided into five stages and features changing guest allies on each phase.
Bowser Jr.
Three fights with Mario — at Warm Fuzzy Plains in the opening hour, in his second appearance mid-game, and atop his Flotilla on the way to the Sky Castle. Bowser Jr. provides Sticker Star’s most consistent comic relief, and his Junior Clown Car reappears unchanged in later Paper Mario titles and in New Super Mario Bros. U.
Kamek
The recurring magic-using antagonist who shoulders most of the game’s chaos. Kamek’s spells crumple the bridge in World 1, fold up the Drybake Stadium in World 2, segment the Wiggler in World 3, free the Boos in World 4, and serve as the penultimate boss in World 6. He fills the structural role that Kammy Koopa held in the original Paper Mario.
Bosses
Sticker Star’s bosses are almost all overscaled versions of pre-existing Super Mario enemies — a deliberate design choice that drew both praise and criticism. Each Royal Sticker boss has a “right” Thing sticker that trivialises the fight, and each can be brute-forced with conventional stickers at much higher coin cost.
Bowser Jr. (first encounter)
Warm Fuzzy Plains, World 1
The tutorial boss. Bowser Jr. demands the Scissors sticker, fights Mario alongside a pair of Goombas, and is dispatched in two or three turns. Losing here is rare; the fight teaches Action Commands and turn order before the chapter properly begins.
Kamek (first encounter)
Water’s Edge Way, World 1
Kamek’s first appearance pads out the World 1 mid-section. He transforms stickers in the album to hinder Mario, then flees once defeated.
Megasparkle Goomba
Goomba Fortress, World 1 — First Royal Sticker
The first Royal Sticker boss, formed by Goombas linking together into a single multi-stack. Mario can split the stack by knocking the right Goombas free, then strike them individually. The optimal answer is the Fan Thing sticker, which scatters the formation outright.
Big Buzzy Beetle (optional)
Hither Thither Hill — optional encounter
An optional super-tough Buzzy Beetle reachable via an alternate Comet Piece. Almost invincible while upright, vulnerable when flipped on its back — Mario uses a Thing sticker to flip it, then hammer it open.
Kamek (second encounter)
Yoshi Sphinx, World 2
Kamek returns with more aggressive spellcasting and a tougher punch. Defeating him lets Mario reach the second tablet piece and continue toward Drybake Stadium.
Tower Power Pokey
Drybake Stadium, World 2 — Second Royal Sticker
A skyscraping multi-segment Pokey wearing the second Royal Sticker on its crowning head segment. The Baseball Bat Thing sticker is the textbook solution. Without it, the fight is a brutal endurance test that will drain Mario’s album rapidly.
Wiggler Segments
The Bafflewood, Loop Loop River, Tree Branch Trail, Whitecap Beach — World 3
Each of Wiggler’s five segments must be hunted, defeated, and brought back to his Tree House. The fights are sympathetic — Mario isn’t trying to hurt Wiggler, just calm the runaway pieces.
Big Scuttlebug
Rustle Burrow, World 3
A giant variant of the regular Scuttlebug enemy, blocking a key piece of the forest route.
Gooper Blooper
Whitecap Beach, World 3 — Third Royal Sticker
The coastal guardian of the third Royal Sticker. The Faucet Thing sticker pours water on Gooper Blooper and forces him to disgorge the Royal Sticker. Without it, the fight drags out and requires careful management of Mario’s poison status.
Big Cheep Cheep
Surfshine Harbor — interlude boss
The Surfshine Harbor blockade. Big Cheep Cheep is one of the game’s harder mid-tier fights and tests Mario’s command of the standard sticker rotation before opening World 4.
Big Boo
The Enigmansion, World 4
Kamek’s crumpled-paper Big Boo, formed from the torn pages of the Book of Sealing. The fight tests sticker management after the long Enigmansion Boo-hunt and ends with the Book restored.
Bowser Jr. (second encounter)
Decal Channel — World 4 transition
Bowser Jr.’s second fight is staged on the Decal Channel television set, a recurring set piece running through the back half of the game.
Bowser Snow Statue / Mizzter Blizzard
Bowser’s Snow Fort, World 4 — Fourth Royal Sticker
A two-phase fight: Mario first dismantles the Bowser-shaped snow statue, then battles the singing snowman Mizzter Blizzard underneath. The Fire Extinguisher (perversely) and the Fan Thing stickers both shine here; without either, Mario will burn through stickers fast.
Petey Piranha
Rumble Volcano, World 5 — Fifth Royal Sticker
Petey Piranha‘s only Paper Mario appearance. The fight opens with him swallowing Kersti, locking out the Battle Spinner. Mario must endure the spike-bubble assault and force Petey to spit Kersti free before the fight can turn. The right Thing sticker is the Soda; the easy way out is to bring an Eekhammer or a stack of Flashy stickers.
Bowser Jr. (third encounter)
Bowser Jr.’s Flotilla, World 6
Bowser Jr.’s last stand atop the Flotilla. Defeat him here and the sky castle’s main gate opens.
Bowser — Final Boss
Bowser’s Sky Castle, World 6 — Sixth Royal Sticker
The final showdown is five stages long. Bowser summons different guest enemies each stage — Whomps, Lava Bubbles, then a Chain Chomp with infinite defense — and Princess Peach is taped to the chain above the throne. The fight ends with the Royal Sticker peeled free, the Sticker Comet restored, and the credits parade beginning. Kersti sacrifices herself to power the comet’s wish-granting; the parade reveals she has been restored.
Enemies
Sticker Star draws its entire enemy roster from the wider Super Mario series — no series-original enemies appear, a deliberate scope decision that distinguishes the game from earlier Paper Mario entries. Returning enemies come in many “paper” variants: Paper-Cone Goombas, 2-Fold Goombas, 5-Fold Paragoombas and so on, sticking to the papercraft aesthetic.
Regular Enemies
| Enemy | HP | Attack | Defense | Where you meet them |
|---|---|---|---|---|
| Goomba | 5 | 2 | 0 | Decalburg, Warm Fuzzy Plains, Bouquet Gardens, Water’s Edge Way, Hither Thither Hill, Whammino Mountain, Goomba Fortress, Drybake Desert, Leaflitter Path, Bowser Jr.’s Flotilla |
| Paper-Cone Goomba | 7 | 3 | 0 | Warm Fuzzy Plains, Bouquet Gardens, Water’s Edge Way |
| Koopa Troopa | 8 | 3 | 0 | Bouquet Gardens, Water’s Edge Way, Hither Thither Hill, Whammino Mountain |
| 2-Fold Goomba | 10 | 4 | 0 | Bouquet Gardens, Water’s Edge Way |
| Buzzy Beetle | 7 | 5 | 1 | Hither Thither Hill, Drybake Desert, Drybake Stadium |
| Spiny | 8 | 5 | 0 | Whammino Mountain, Drybake Desert, Yoshi Sphinx |
| Bob-omb | 7 | 3 | 0 | Goomba Fortress, Bowser Jr.’s Flotilla |
| Paragoomba | 6 | 3 | 0 | Goomba Fortress, Drybake Desert, Yoshi Sphinx, Damp Oasis |
| Swoop | 9 | 4 | 0 | Drybake Desert, Yoshi Sphinx, Sandshifter Ruins, Bowser’s Sky Castle |
| Sombrero Guy | 15 | 4 | 0 | Drybake Desert, Yoshi Sphinx, Sandshifter Ruins, Drybake Stadium |
| 5-Fold Paragoomba | 40 | 5 | 0 | Drybake Desert |
| Pokey | 16 | 6 | 0 | Drybake Desert, Damp Oasis |
| Pokey (Green) | 20 | 6 | 0 | Drybake Desert, Yoshi Sphinx |
| Snifit | 10 | 5 | 0 | Drybake Desert, Drybake Stadium |
| Stone Spike | 14 | 6 | 1 | Sandshifter Ruins, Yoshi Sphinx |
| Cheep Cheep | 9 | 4 | 0 | Whitecap Beach, Surfshine Harbor |
| Cheep Cheep (Spiny) | 11 | 5 | 1 | Whitecap Beach |
| Poison Blooper | 12 | 4 | 0 | The Bafflewood, Loop Loop River |
| Scuttlebug | 9 | 4 | 0 | The Bafflewood, Rustle Burrow, Tree Branch Trail |
| Piranha Plant | 10 | 4 | 0 | Leaflitter Path, Tree Branch Trail |
| Putrid Piranha | 12 | 5 | 0 | Tree Branch Trail, Rustle Burrow |
| Bone Goomba | 9 | 4 | 0 | Drybake Desert, Bowser’s Sky Castle |
| Dry Bones | 14 | 5 | 0 | Bowser’s Snow Fort, Bowser’s Sky Castle |
| Bony Beetle | 17 | 6 | 1 | Bowser’s Snow Fort, Bowser’s Sky Castle |
| Spear Guy | 15 | 5 | 0 | Shy Guy Jungle, Long Fall Falls |
| Magikoopa | 20 | 7 | 0 | Bowser’s Snow Fort, Bowser’s Sky Castle |
| Ninji | 14 | 6 | 0 | Whiteout Valley, Bowser’s Snow Fort |
| Boo | 10 | 5 | 0 | The Enigmansion |
| Big Boo (regular) | 30 | 7 | 0 | The Enigmansion |
| Chain Chomp | 50 | 10 | ∞ (immortal) | Chomp Ruins, Bowser’s Sky Castle |
| Lakitu | 14 | 5 | 0 | Rugged Road, Rumble Volcano |
| Spike Top | 11 | 5 | 1 | Rumble Volcano |
| Lava Bubble | N/A | 5 | 0 | Rumble Volcano, Bowser’s Sky Castle |
| Whomp | 50 | 10 | Reduces damage to 1 (except Things) | Bowser’s Sky Castle |
A note on Sticker Star’s enemy variants: Paper-Cone, 2-Fold, 3-Fold, 5-Fold and “Big” variants of base species reuse familiar enemy art with different paper-construction tricks — folded cones, stacked layers, oversize prints. The visual variety masks a relatively small base roster.
References to Other Games
Sticker Star is laced with musical callbacks, art references, and gameplay shoutouts to almost every era of the Mario series. Many are subtle environmental touches, others are full musical arrangements.
References in Later Media
Sticker Star’s elements have rippled through Mario games released after it, particularly in subsequent Paper Mario entries and in Smash Bros.
Hidden Luigi — All Five Locations
In five specific stages, Luigi can be spotted in the background. Paperizing the scene allows the player to peel him out, prompting him to look around the camera, jump offscreen, and quietly leave. Finding all five Luigi cameos rewards the player with a credits parade led by Luigi himself.
- W1-6 Goomba Fortress — at the end of the bridge to the tower, Luigi is perched on the fortress wall.
- W2-5 Drybake Stadium — on the outdoor section of the fourth floor, Luigi peeks from a window on the right.
- W3-12 Whitecap Beach — at the end of the broken pier, Luigi sits on a distant rock.
- W4-5 Whiteout Valley — near the top of the ski lift, Luigi is on a chair coming the other way.
- W5-5 Rugged Road — past the Save Block, falling volcanic debris breaks through the floor. The underground section it reveals contains a hot spring with Luigi soaking inside.
Development
Sticker Star’s design originated when Shigeru Miyamoto asked Intelligent Systems to develop a Paper Mario game for Nintendo 3DS with no story to speak of and focused on the simple act of playing as Paper Mario. Director Naohiko Aoyama and the Intelligent Systems team pushed back on the no-story brief but accepted the spirit of it, stripping the cast of partners and the world of leveling-up in favour of a tighter, more puzzle-oriented loop. The sticker mechanic emerged from prototyping the question “what if every attack was a one-time consumable from a literal sticker book?” — and the album-management tension that creates became the central design pillar of the game.
The papercraft visual style was developed in close partnership with Nintendo EAD, who supplied environmental designs and asset pipelines that allowed the 3DS hardware to render fully papercrafted scenes at 60fps with stereoscopic depth. The Thing sticker system arrived late in development as a solution to puzzle pacing — designers wanted players to encounter recognisable real-world objects as out-of-place rewards. Composer Taishi Senda scored the game, drawing on the wider Mario back catalogue for the arrangements documented in the references section above.
Reception
Sticker Star received mixed-to-positive reviews on release. Its visual style, soundtrack and Thing-sticker puzzle solutions drew widespread praise, while the absence of a traditional partner system, the lack of an experience-point loop, and a handful of late-game puzzles that hinge on bringing specific Things to specific bosses drew criticism. The game became one of the best-selling Paper Mario titles to date, helping cement the visual and structural direction the series would take through Color Splash and into Origami King. Among critics, IGN gave the game an 8.3/10, Game Informer 8.5/10, and Nintendo Power named it a runner-up for handheld game of the year for 2012.
Within fan communities, opinion remains divided. Sticker Star is championed by some as the boldest reinvention of the series and dismissed by others as the moment Paper Mario stopped being an RPG. The middle ground accepts both: Sticker Star is the most experimental Paper Mario, and the choices it made shape every subsequent entry in the series — even where the later games walk those choices back.
Trivia & Notable Details
- The first Paper Mario game released for a handheld console.
- The first Paper Mario game not to start at, or feature, the Mario Bros.’ House.
- The first Paper Mario without Flower Points, Star Points, Experience Points, Badges or traditional Items.
- Mario has no partners to battle alongside him — Kersti provides the Battle Spinner but never enters a fight.
- The first Paper Mario game in which Lady Bow and Parakarry are entirely absent (Parakarry is name-dropped on a paper in Shy Guy Jungle).
- Every boss in the game is a more-powerful version of a pre-existing Super Mario enemy — none of the bosses are unique to the Paper Mario series.
- Kamek takes on the structural role that Kammy Koopa held in the first two Paper Mario games.
- The Sticker Comet is referenced in dialogue across Paper Mario: Color Splash and Mario & Luigi: Paper Jam.
- Sticker Star is the only Paper Mario where Bowser does not speak a single line of dialogue, lending the final boss an unsettling silence.
- The game contains five Hidden Luigi cameos; finding them all triggers a Luigi-led credits parade.
- The Eekhammer family of stickers (Eekhammer, Big Eekhammer, Massive Eekhammer) is the closest thing the game has to an iconic original sticker design.
- The Sticker Museum at Decalburg allows the player to display every sticker, Thing and Royal Sticker collected — completing the museum is the game’s primary post-credits goal.
- Hidden Wiggler’s Diary entries unlock progressively across World 3 as Mario reunites the Wiggler Segments; reading them all provides backstory on the forest.
- The “Hidden Luigi” minigame is the seed of the “Where’s Luigi?” thread that later threads through Paper Mario: Color Splash and Origami King.
Release Information
Japan
Released as Paper Mario Super Sticker (ペーパーマリオ スーパーシール) on December 6, 2012.
North America
Released on November 11, 2012.
Europe / Australia
Released on December 7, 2012 in Europe and December 8, 2012 in Australia.
Korea
Released on March 28, 2013.
Genre
Action-Adventure / Role-Playing
Developer / Publisher
Developed by Intelligent Systems. Published by Nintendo.
Director
Naohiko Aoyama
Producers
Kensuke Tanabe, Hiroshi Sato, Shigeru Miyamoto
Composers
Taishi Senda, Yuka Tsujiyoko
Modes
Single-player only
Stereoscopic 3D
Full 3D support; particularly effective in paperized scenes and the Decalburg hub.
StreetPass & SpotPass
Neither feature is used.
References / Information
Plot detail, boss statistics, enemy locations and the references-in-later-media list draw on the community-curated Paper Mario: Sticker Star article at the Super Mario Wiki (mariowiki.com/Paper_Mario:_Sticker_Star), used under its Creative Commons Attribution-ShareAlike licence. Boss HP and attack figures match the in-game data tables. The Hidden Luigi locations correspond to in-game visuals confirmed by player-community guides. Where Sticker Star elements appear in subsequent games, references draw on the relevant later game’s MarioWiki article in turn.
For the broader history of the Paper Mario series, see our dedicated pages on the original Paper Mario, Paper Mario: The Thousand-Year Door, Super Paper Mario, Paper Mario: Color Splash and Paper Mario: The Origami King.